Last year I, well you could say I fell in love with make up again, and I got a huge crush which ended in endless research on companies and beauty videos on youtube and shopping. I soon discovered mac cosmetics and their endless variety of eyeshadows. I just love what makeup can do for you, how it can alter your appearance with the tiniest modifications, how you can sculpt your face just by adding a highlight or a contour. It's just amazing! Anyhow I got a pro palette at my mac store and a few of their shadows. Online I also got a few empty pans that I re-pressed my beloved shadows that I owned before to make them fit the pro palette and to have a clean look of the whole palette itself. One thing I didn't like was that even if the whole palette felt pretty sturdy the eyeshadows themselves had a little space inside the palette to wiggle around while travelling or even when padding your brush into it. And wiggling sooner or later means breaking. So what does a crafter do? She does something about the situation and solutes the problem. ^__^ I bought foam rubber sheets (you know this rubber sheets we all used to work with as kids) and cut them to fit my shadows securely.

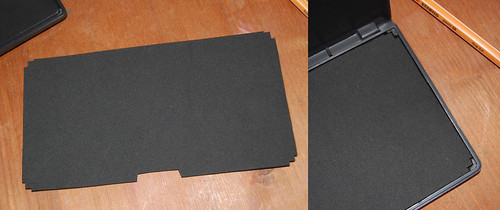
 One of the rubber sheets I needed to fit a little more precise into the palette, since the divider was glued in and there was a sort of "socket" left, the pictures surely make clear what I mean. The second sheet I let as it was, it will become the top sheet.
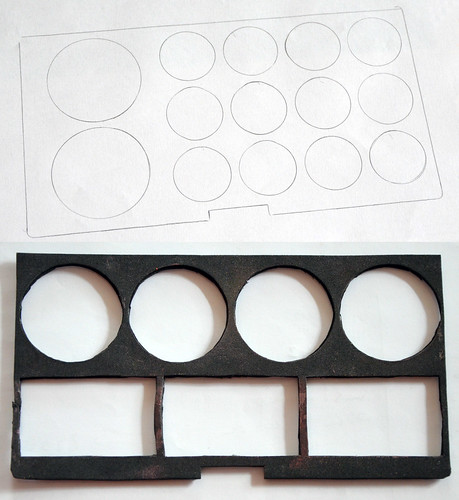
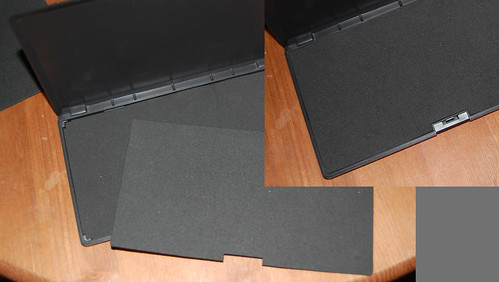 Now I used the divider as a template again to draw on the places for the shadows. To better show I made a sketch on paper as well, but you can draw onto the rubber sheets directly and cut them out later.
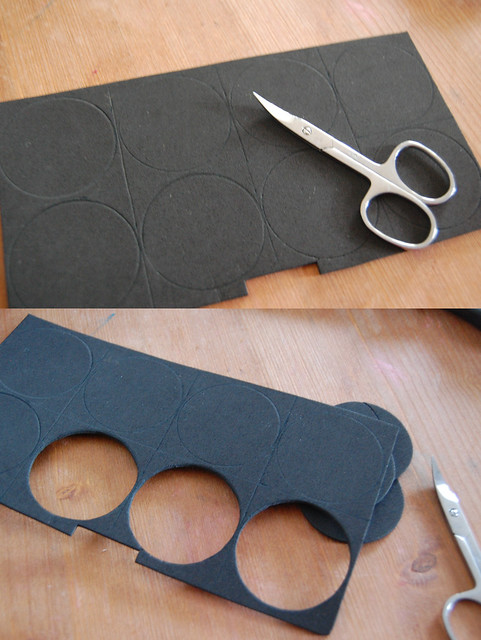
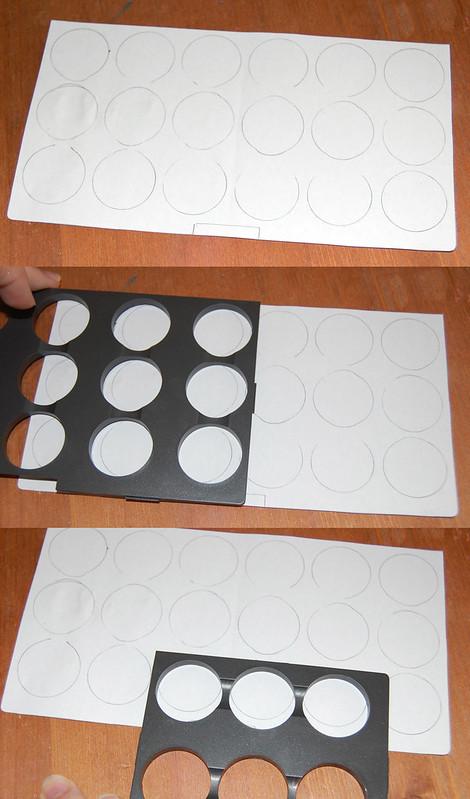 In the next picture you can see I also made a blush palette and cut out the holes for the blushes. To cut I used small scissors so that I was able to slowly and carefully follow the drawn on outlines. The first rubber sheet to cut is the later top sheet.
 Now I glued the cut layer to the layer that is still uncut and positioned them inside the palette. Let dry overnight. (I also tried to press the two layers but that resulted in an sort of distorted result which didn't fit the shadows/blushes properly anymore)
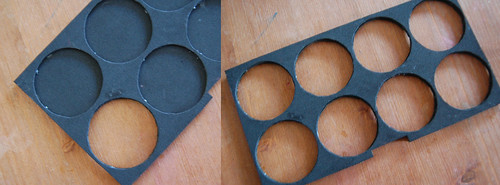
 When the glue is dried I just cut to bottom rubber sheet as well.
 the finished palette
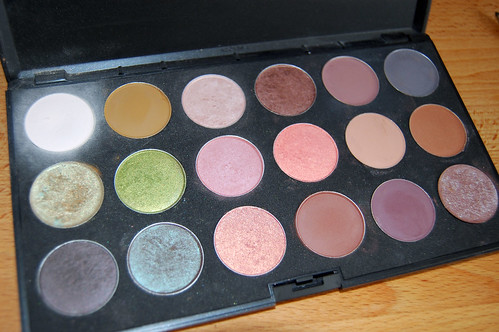 I'm surprised to see that the summer palette from last year looks significantly different than this year.
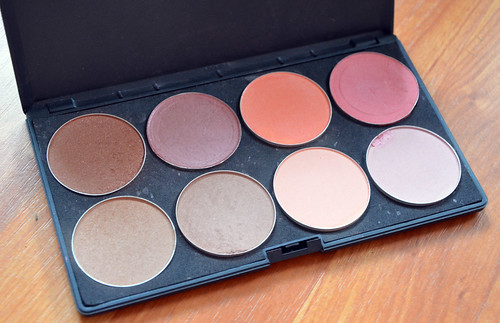
 and my blush palette as well
 and of course you can not only make your palettes fit more eyeshadows or blushes you can also make it fit eyeshadows AND blushes or other companies products as well. I made a few paper sketches to show:
 _________
this is basically all the makeup I need on an everyday basis and it will fit into a small makeup bag that sits in my bathroom, it takes like no space at all and give me lots of possibilities and creativity I could think of, plus when I'm traveling I still have everything with me and don't over-pack my bags with boxes of makeup. I hope you found this tutorial helpful ^__^
_________
this is basically all the makeup I need on an everyday basis and it will fit into a small makeup bag that sits in my bathroom, it takes like no space at all and give me lots of possibilities and creativity I could think of, plus when I'm traveling I still have everything with me and don't over-pack my bags with boxes of makeup. I hope you found this tutorial helpful ^__^