12/29/2008

zipper shut


Sylivi is finished !!!! I'm so happy

I sewed in a zipper with the help of some lovely tutorials I found on the net, like the one of the talented Grumperina, who also links to Claudia and her great zipper how to. You may also find the tutorial of knitpics very helpful, they have a pdf.

12/28/2008

pheeew!

Sylvi was blocking the last three days and today I started the last little bits on it. I sewed the collar down and looked scared at my yarn, getting lesser and less and my last petal on the needles. And what can I say, lucky me had enough yarn! pheeew! (not that I really am a lucky one these days, my boyfriend sort of broke our relationship on christmas ewe, but that's another story) Nevertheless I made all petals, no more yarn needed, and I don't have anything left except the swatches. The last petal doesn't have enough yarn tail to sew it to the body but I think some ends of the other petals might do. I am sooo glad my yarn lasted long enough, I was frightend of raveling the swatches. So long, maybe tomorrow will follow some pictures of the finished piece. Otherwise have a good start into next year!

12/22/2008

where fox and mouse meet


I'm doing better again and obviously the cold had a very good impact on my creativity. I made some new amigurumi. I'll call them little animals and they are sooo cute =^__^=
Someone on etsy asked me if I could make a fox and I said I would try after I had my christmas stuff all done. At first I thought I would go for a "humanoid" fox, like my fairy only with fox ears and tail and everything. But after some researches and my first crochet stitches I decided to go for a baby fox, with a small body and a big head. I liked the form so much that I started to make a mouse and a giraffe and a little mouse, and I believe that one or two more little animals will follow.


12/19/2008

cough'n'sneeze

so I'm ill and in bed. No knitting but a little crocheting.
I made one more of my "little animals". It started as a fox and now I have something that is going to be a mouse, I think there will be one or two other little animals as well, like a monkey or a giraffe.


to talk a little about Sylvi, I'm about to start neckline shaping at the fronts, but the numbers make my head blur at the moment, also I think I will need to add some rows and also decreases at the arms and back, because the pattern is written for a hood and I want to go with a tighter ribbed collar.


oh, and I made cookies two days ago:


I call them cristmas pillows, they were inspired by the vampire cookies from baking bites. I used the dough, only with 1/2 cup more flour. The filling is a ganache made from cream and the double amount of chocolate with roasted and chopped almonds and cinnamon and coriander.

12/15/2008

put all remaining sts on holder

I finished the back of my Sylvi! and already started the fronts =)


yesterday I also sew a nose to a little new amigurumi I started on the train to Hannover: a fox, isn't it adorable? still blind and no legs but sniffing it looks cute!


and I have holidays!!!, four full weeks filled with nothing else but knitting, crocheting, cooking and eating and sleeping late. It's also winter and I could tell that even clearer after I read some of the blogs I subscribed to. Snowflakes everywhere!

I also made one - a virtual one. (while waiting for the dye process to finish on my hair)

snowdays is a cool site to create greating cards with a selfmade snowflake on it.

This is mine:


If you want to put it to paper it's also a good way of testing your cuts before making them / before it's too late. (btw. instructables posted a nice tutorial on paper snowflakes)

12/14/2008

gauging Sylvi cardigan

Just a quick note if you like the idea of a Sylvi cardigan just as much as I do. I noticed this while knitting and am very happy that my gauge is off and I didn't try too hard to get gauge.
I'm not completely done with the back yet but since the main pattern is the back and I realized this I feel I should keep this in mind and note somewhere.

It's a really good idea to have more stitches per inch than the original pattern calls for (a cardigan normally isn't as wide as a coat). The pattern calls for 12 sts / 10 cm and I have 14. I needed to make changes to the pattern (like starting the bobbles for the flowers two rows earlier) to keep them from hiding themselves within the sideseams. And now having made some more rows I find that next time I knit this I would try for 16 sts per 10 cm. Just to have more scope for the flowers and leaves.

12/13/2008

expedition hamburg

spent the day on the hamburg christmas market, very nice, I had an awesome apple punch, with cinnamon and cream and caramel topping

but now it's picture time:


I also wanted to show you the progress on the back of Sylvi, I followed the pattern for the first 20 rows and added decreases at both sides of the main pattern to have a waist shaping, then I followed for some more rows and started to increase again ignoring the decreases of the pattern, and knitting front and back directly left and right to the leafy section, sometimes before, sometimes after the bordering purl stitch. Now I'm about to start the arm decreases. The first flower is two rows lower than the original pattern, otherwise it wouldn't have fitted onto the jacket any longer and the bubbles would have been directly on the side seam. Now the flower is directly at the waist and I think two of the petals will be sewn 'around' to the front.


In Hamburg we first went to the Hamburger Wollfarbik, I was about to get my birthday present there: 250gramm of the finest 2ply 100% merino lace yarn, see the gorgious color?


edit to say that the lovely blue yarn will turn into the South Seas Stole by Laura Patterson (ravelry link)
and to share this fantastic hamburg christmas market Santa Frog:


12/11/2008

no milk today

well, I had milk for breakfast it's just that this song was in my head ever since early morning. Today I'm in Hannover on a congress, tomorrow as well. I just wanted to keep you updated. I made some progress on Sylvi, but I'm not finished yet because I needed to forbid myself to knit! Why? you ask?, because I needed to crochet and get some christmas presents finished that were custom orders. A cute yellow seahorse, a turtle and the blue fish you saw on the Sylvi swatch are going to Berlin to make three little people happy. And not knit was quite a torture! Believe me, because you need to know that I woke up on last sunday morning at half past five (!) with Sylvi on my mind and how to shape the back, waist section.
Also something very cute happened this morning when I was hanging around the main station waiting for my train to arrive: a lady asked me if I were from Rostock (which I am) and if I wanted to be the "face of the day" tomorrow (which I said yes to). So tomorrow there will be a picture of me in the local newspaper with some info on my job, that I was on my way to this congress and also that I crochet creatures. Really made me smile!
and super duper as well: I get to stay at a friends, we're going to chat and have wonderful diner (fish plate). We haven't seen each other for a couple of month.

see you tomorrow with pictures of dolls and green Sylvi and newspapers

=^_^=

12/08/2008

whoo-hoo

If you want to see a picture of me drinking coffee, have a look at etsys new storque issue. Pearlswirl is the author and she gives a little insight in what it's like to be a crafter in germany, she's making her jewelry in Stuttgart and she actually asked me if she could write something about my little shop - dah! of course she could!

12/07/2008

calculating


I've finished the sleeves and started the back, whoop whoop!

but to get there needed some math. I wanted to stick to the original shaping of the armholes for the sleeves and also for the back, the only problem: gauge.
My gauge is off and so I needed to calculate everything up to my gauge, so seven sts BO under the arms turned into eight sts in my version. The "real" hard nut to crack was the raglan decreases. I never made raglan before so I didn't had any experience to profit from, and the fact that the pattern calls for decreases every second row for so and so many times and every other row for x number of stitches made me worry. Until I realized that in my gauge, thanks to my enormous row gauge, I could simply decrease two stitches (one left one right) every third row. Nothing more nothing less.

Also thanks to my "enormous" row gauge I can use most of the orignal pattern for the back. I can start with the pattern as it starts, only I'm mirroring rows 1 to 60. I will continue with row 103 and knit until the end. The 'pattern crossing' needed little manipulations for a leaf and one cable was eliminated. The drawn pattern looks pretty. I can't wait to see it knitted.


BTW: my gauge is 14 sts and 22 rows per 4 inches, so my cardigan should have a final lenght of nearly 50 cm.

12/05/2008

colorful

I don't think to show you some more 60 rows of seed stitch on sleeves are very interesting so I'll share some photoshop trials I made when I needed to decide on a color for my second try on Sylvi:


when you click on the image it'll be huge


btw. I'm ten rows away from starting the raglan shaping of the armholes

12/02/2008

musketeer sleeves


I don't really know what to post about since I found knitting in the round pretty non-spectacular lately and making sleeves is knitting in the round. But nevertheless I made some nice progress: started the sleeves with my new green yarn and it feels absolulty gorgeous, but it's knitting not so nice, the yarn is not plied so it's more or less like holding 12 strands of yarn together, but it works out pretty nice, it slows me down but knitted it looks beautiful.


So what did I do this time? I changed from 2*2 ribbing to 1*1 ribbing on the new yarn, I think it matches better with the seed stitch. Also I changed needle size to 7mm needles to get close to gauge. And, maybe the most important thing, I increased to the full width fo the sleeve right at the beginning. This way I could do all the increases within the ribbing and not within the seed stitch (I found it looks weird, maybe because of the biiiig stitches, but I don't really know). So now I have these musketeer-like sleeves, you know tight cuff and wide sleeve. I also made some rows of seed stitch before I added a leave motif, this way it will show off at the back of the sleeve and won't hide itself in the bending of the beginning of the sleeve. The leave motif is one I found on the hood of the pattern. I only changed the increases to cabling and cabled instead of decreasing (I could have just made purl and knit stitches to create a leave but I found the shaping of it very adorable) and due to the fact that I don't increase, which means I don't have yarn overs in the middle of the leave I added 4 single purl stitches to give some texture to the motif, pure stockinette looked a bit boring.

11/27/2008

it's green


the yarn for my new Sylvi arrived today, yeah =) and it's lovely, have a look


it's a very warm shade of green, dark, woodlike but still friendly, and it feels good, it has a great touch. Just made a swatch


it's still sitting in the sink right now, and after the meassurements I made before it went to take a bath I think I will go up a needle size, but let's see what it behaves like after the bathtub. . .

11/26/2008

gauge, swatching and no yarn

I've been expecting to come home today and a find a supreme packaging with the finest yarn, for the Sylvi (a dark fernlike green - 100% merino - yummi), but NO yarn package

instead I spent the day to research a little on ease, positive and negative, it's actually very simple, negative ease = tight fitting, positive ease = loose fitting. You can read some more on knitting daily or TECHknitter. I also found out that measuring your clothes is a good idea to find out about your true size. (please also read on TECHknitter)

and coming back to swatches I started a forum post on ravelry asking how to treat your swatch to have a nice fitting garment. I wonder on blocking in particular, not IF to block but HOW block it, I'll keep you informed.

11/23/2008

sketch for sylvi


instead of sitting down and start crying now that I frogged my Sylvi I decided to distract myself, but what to do? no yarn to start Sylvi again, enough yarn to start another wip, but another wip means to have one more wip and one more wip is having less time for the other wips, and I really plan on finishing Sylvi as soon as possible. So I sat down and was thinking a little more on the cardigan idea, read some rav entries on it and made a sketch on what I plan my cardigan to look like.


I changed the sleeves again to be more airy (I remembered on the beautiful sleeves of my cleaves) and also made some sketches on the neck, high victorian collar.


I also have some custom orders to finish so maybe this whole thing of not being "able" to knit is sort of good, enough time to crochet turtle legs and shells.


11/22/2008

frogged


not yet . . . but I'm about to frog my Sylvi, the yarn is just not working for seed stitch. I choose a 100% acrylic yarn and I learned it will never ever "learn" to stretch/hold the stitches like wool would.
There are a few other things that I would like to change about me sleeves so I would have frogged anyway, like the increases look weird and could have been positionend a little more centered, so that they would have been directly under the arms, now they lean to the back but that's just a minor issue. The other big thing is I wouldn't know if the yarn would have been enough.
So now I can just order new yummi yarn, 100% wool/merino, and enjoy it. But before enjoying the new yarn there's the hard question of choosing a color. I want to order from the "Hamburger Wollfabrik". They offer to put together your yarn exactly as you want it, how many plies, how much and all onto one skein, so there will be no yarn ends to weave in (happy face) but they also offer about 100 thousand different colors.


11/21/2008

sylvi sleeves

Sleeves half done =) and one ball (the gauge ball) used.


I started with a tubular cast on even though I wasn't sure on my gauge. I still am a little concerned about it I just counted rows again. The main spectrum of differences is within the rows (21 to 28). The stitches seem stuck between 14 and 16 so I went for 15 and casted on 32 sts for a 2*2 ribbing. I made the ribbing for nearly 7", since I like long and tight sleeves for a cardigan. After that I changed to seed stitch and increased 8 stitches in the first row to have 40sts. I added one panel of the back pattern, a leave, which I mirrored to be equal on both sleeves and due to the first increase of the stem of the leave and the fact that I didn't decreased sts at the top of the leave but made cable work here I now have 42 sts (this was irritating for me at first, I was sure I had only 40sts).

The yarn is very soft and feels good to the hand. I love this dark red color, very warm. But my main concern is to run out of yarn, I already make plans on "minimized" fronts to save yarn. I have 10 balls, 500g total and a yardage of about XXmeters and I really, really hope it will be enough but still fright it won't. I calculated to use 2 balls on each sleeve, 3 more on the back and tha last 3 on the front, but it still feels unsure :/

11/18/2008

FO and a swatch


another Chubby Fish is finished, I added a little star, I think it looks cute =)
You can find the pattern at the sidebar.

Also I finished a swatch for my new Sylvi, I look at it and like the color and also like the stitches (it's off gauge but that doesn't matter, need to change it anyway) but I can't figure out how to count with the seed stitch. It stretches enormously, in both directions. I measured when it was still wet and pinned to the couch and I had 14 sts and 21 rows, when it was dry it had 15 sts and 25 rows now that I played with it the whole day it has 15.5 sts and 28 rows, but when I stretch it I can give it whatever sts and rows I want.
I think this is what is called "ease". I happen to read it alot lately. Alot of patterns have positive or negative ease. I haven't made a little research on it so I'm not sure what this knitting term really relates to but I think I don't like patterns to stretch or shrink, what do you think?
And to confuse me even more I'm starting with the sleeves. Over at ravelry Tikru the designer of Sylvi made the great suggestion to begin with the sleeves to see if your gauge is correct (not as much to frog and you have the sleeve cuffs done!)

11/17/2008

selfish knitting

I just read this article in the new issue of twist collective. It's about how some knitters (I don't say knitters in general, although the article does, cause I never did) only seem to knit for their relatives and friends and never for themselves. Well I never did, don't know why cause I wanted to, I often see a pattern and think it would be perfect for my friend Anne or this is the most gorgious mittens, perfect for my mom, but I never happened to actually start knitting for others. Maybe I'm selfish and early realized my time schedule doesn't have enough hours to knit and crochet for me and for others, so I never did or maybe I'm just selfish and think people will not appreciate my hard work, I dunno. But this year is sorta different: I already made bookmarks as xmas gifts.
And to not get tooo non-selfish and generous I will start this beautiful coat of the winter issue of tc: Sylvi


Isn't it just a masterpiece of knitting? Yesterday I spent the afternoon in re-designing the back so I can wear it as a cardigan. I only need a swatch and therefore I'm buying new needles this afternoon.

11/16/2008

dressing up!


It's winter, outsides getting colder and everybody needs warm clothes, my fairies as well!


I'm just putting together a pattern for my fairies and since the dress I made is knitted and I can't "force" everybody who will buy the pattern to (probably learn to) knit I'm designing a crocheted dress. Not as easy as pie, actually pretty difficult. I was sure on leaves! the pattern should have leaves as well (just like the knitted piece) but to put them together was hard. I started out with pearl yarn because I like that it's thin and the fabric will be as well, but seemed like I couldn't find a proper way HOW. I tried flowers with leaves, pur leaves, just not right. And suddenly I had the idea of using a larger hook. This way the leaves will be bigger and hide more of the dolls body. Well the result is pictured below.


11/10/2008

FO bath mat


I never thought I ever would show my bathroom to the world, but this post is about my new bath mat so here we go


pattern: my own, different flowers and leaves
yarn: no real yarn, but ~0,5 mm in diamter and has the texture of an i-cord
hook: 10 mm


this mat was pretty easy and also worked up pretty fast, the huge hook was a good help at this - all in all it took me about 4 or 5 days to finish this, the worst part of course was hiding all the yarn ends. And call it luck or not, but this mat would have been a bit bigger if I hadn't ran out of yarn. Also I think it's a great idea to use yarn left overs and turn them into loooong i-cords to crochet one of these. I can imagine one in lots of different colors lying in my living room and replacing my carpet. Another good reasons to knit more stockings to have the left overs turned into flowers to decorate my floor. =^_^=

11/06/2008

Chubby Fish PATTERN

finally Charly will get a friend, the pattern for Chubby is finished and ready to download, it's a free pattern so you may wish to give some more friends to Charly ^__^


press DOWNLOAD to download (it's a ravelry link but should work for everybody else as well - please leave me a message or comment if otherwise)


please respect my copyright and don't sell any Chubbys you made.


_________


ERRATA:
backfin:
when I write "turn" in the second row please don't really turn but continue to crochet on the other side of the chain. This way you create a round that you can build the next rows onto. I will update the pdf as well.

11/02/2008

FO fan bookmark


pattern: fan bookmark by crochetroo
yarn: pearl yarn, coats
hook: 1.5 mm
notes: didn't made the 1sc at the beginning of every turning row


when reading the forums at ravelry yesterday I came across the beautiful fan bookmark again, again because I had this in my queue for a while.
and yesterday I finally started because I needed (well I wanted) one for myself plus I thought it will make great christmas gifts.
I started right away (my bath mat needs assembling and when you're reading here you know I don't like finishing, means I don't like weaving in the ends and putting a project away)
Anyhow the bookmark pattern works very smooth and quick. I finished one bookmark in about one and a half hour. That's what I'd call a last minute gift. It crochets really fast I only needed to take care of the spaces where to join with the formerly made fan. somehow I wanted to join everywhere, which is a mistake and I frogged a few times.

but they turned out very well and I think I'm about to make at least two more.

10/31/2008

a day off with flowers

this morning I switched through to CNN news when they were talking about the snow in germany - as I told you yesterday it's winter now, and the fact that CNN was talking about it makes it only more freezy.
It didn't snow around my area (at the baltic sea there is snow very rare) but it was stormy and rainy and this kind of weather is creeping into your clothes, not like snow which you can enjoy and have fun with . . .

but today is Reformationstag (thanks to Martin Luther, not the "king" but the monk), which means I have a day off and can stay at home, that I don't need to go outside to check how cold it is and it also means I have a whole day of relaxing, crocheting and eating ^__^


and I have a nice project I can show you - tatata - my new bath mat!
I like the teal color and I like the idea that it's made of flowers. And I like the fact that it's made with a 10 mm hook

so long, for those who have a day off Happy Reformationstag and all you others Happy Halloween

10/30/2008

fall is over


yepp, it's officially winter, my wardobe will turn winter!.
Today has been the first day that has been really freezing cold: rainy, stormy and only 4°C
that's bitterly cold and definitly too cold for my "normal" clothes, so be aware winter I'm preparing!


And I've also received my first winter greetings in the post today.


aren't these stars lovely? I guessed correctly when Katrin of marsupialia was asking what she was making (a christmas calender). Katrin and Barbara are starting a new buissness and just started a blog (so there wasn't that much competition, ^_^ but hey I won, that's all that counts ^_^ )

They providing the pattern for the little star at their blog, it's very cute and easy to make.
You also should check out a bit of their stuff, they want to open a store for new designers and mainly sell bags, all sorts of (clutches, bigger handbags, messenger, purses, everything; what thrilled me most during the last posts was this one on felt-zipper bags, these are the most creative bags I've ever seen)

Thanks so much Katrin the stars will be decorating my window plants, the straw-like color is gorgeous and will absolutely bring some nice winter feelings to my room (not this freezing cold ugh weather)

10/27/2008

HOW TO - amigurumi hair

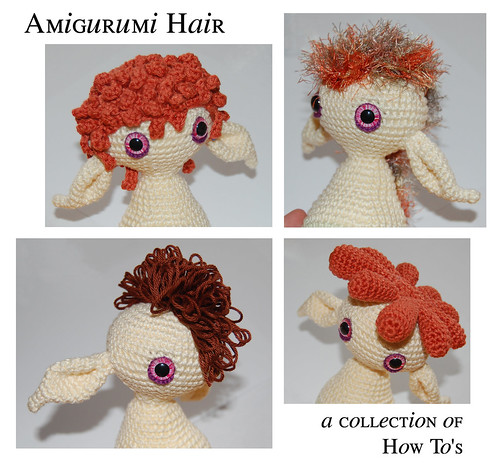
a collections of methods

There are alot of ways to create doll hair. You can crochet every single hair at a time, you can use fun fur and receive hair very quickly. You can embroider a nice hairstyle to your dolls head. You also could knot hair by hair to the head or make a fringe and start from this to have full hair that's blowing in the wind.
This tutorial will show all ways I know of and explain how you can create them. Therefore I sorted the single parts of this tutorial like this: fun fur hair, crocheted hairstyles, embroidered haircuts and fringe style hair.


FUN FUR HAIR


Until now I preferred fun fur or fuzzy yarn to give a doll some hair. It's very fast and looks very full.
For some real good tips on working with fuzzy yarn I would like to link to June of PlanetJune, she shares some real good information on fuzzy yarns.
I also would like to add one more tip: use a hook that's big enough. This helps alot seeing your stitches and it's not necessary to crochet tight when you want to make hair.

You can crochet simply in the round, like you would when making the head of your doll, increase for as many rows as necessary but don't get a bigger circumfarance than the dolls head. Now go from here and crochtet a few more rows without increasing. You receive a wig or a furry cap that you can use as hair.

you also can create other styles like a Mohawk haircut (I use this alot for my trolls, a Mohawk suits best for trolls I think ^_^)


The directions for this are:
1 -- chain 25
2 -- start in 3rd stitch from hook: make a double crochet (dc), make a dc in next st, triple crochet (tc) into the next 4 sts, dc into the next 5 sts, single crochet (sc) into next 12 sts
3 -- continue on other side of starting chain: sc 12 times, dc 5 times, tc 4 times, dc into next 2 sts and end with a slipstitch
Bind Off

cut your yarn and leave a quite long yarn end

To cut a long yarn end is a good tip for every hairstyle, this way you can use the yarn end to sew the hair to the head and don't need to add extra yarn (extra yarn means extra ends to weave in)


crocheted hairstyles


To crochet a haircut is as easy as to crochet your doll. You can use the same type of yarn you used for your doll and of course the same hook. You can crochet Ponytails or piggy tails like in this picture from the talented May (check out Isabelle and her flickr profile: pureEva).

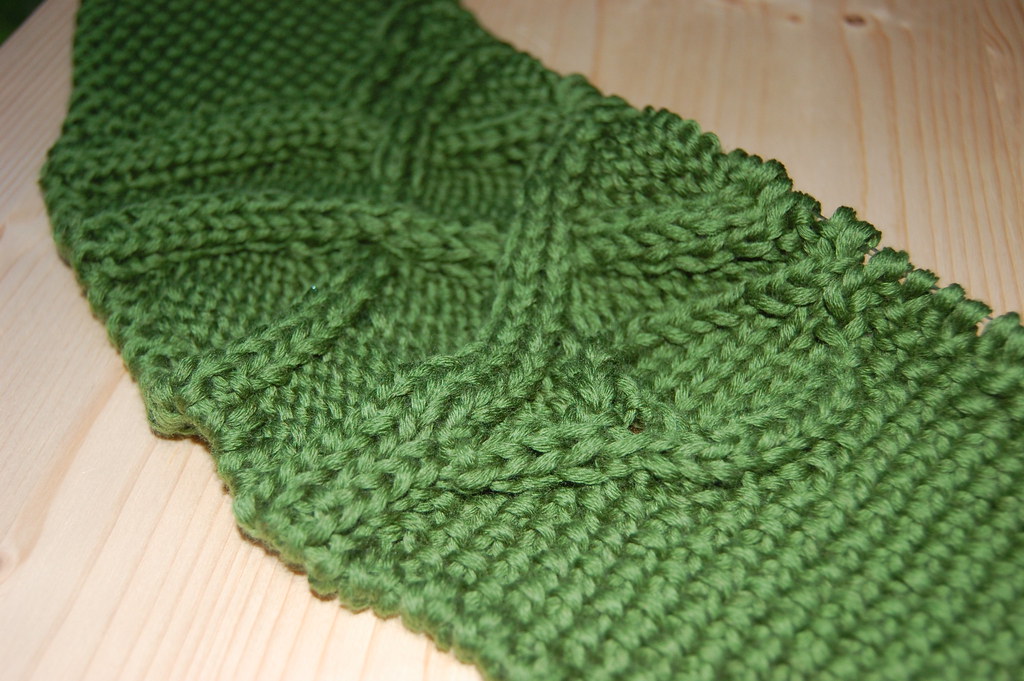
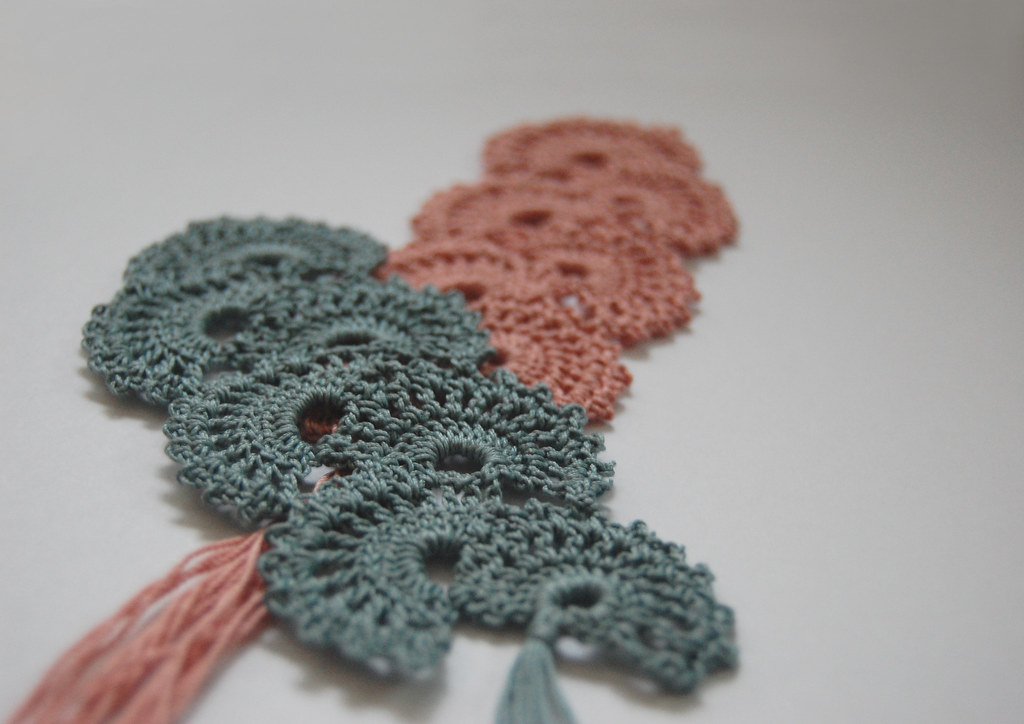
Above is a picture of the style I just made, something that should look like thick curled hair, a little bit rasta style - maybe it reminds some of you of Carl, Jimmy Neutrons llama-loving friend, cause his hair is what I had in mind when making these:


When you want to recreate it go like this:

Edit: dr is a double ring, and m2 stands for a simpl increase: make two sts in one

SIZE A
1 -- make a dr with 5 sts
2 -- m2 x5
3 til 5 -- sc 10 sts
6 -- sc8, sc2tog
7 -- sc7, sc2tog
8 -- sc6, sc2tog
9 -- sc5, sc2tog

SIZE B
1 -- make a dr with 6 sts
2 -- m2 x6
3 til 4 -- sc 12 sts
5 -- sc10, sc2tog
6 -- sc9, sc2tog
7 -- sc8, sc2tog
8 -- sc7, sc2tog
9 -- sc6, sc2tog
10 -- sc5, sc2tog

SIZE C
1 -- make a dr with 8 sts
2 -- m2 x8
3 til 4 -- sc 16 sts
5 -- sc14, sc2tog
6 -- sc13, sc2tog
7 -- sc12, sc2tog
8 -- sc11, sc2tog
9 -- sc10, sc2tog
10 -- sc9, sc2tog
11 -- sc8, sc2tog
12 -- sc7, sc2tog
13 -- sc6, sc2tog

I made 3xA, 4xB, 2xC and sorted like this: C-B-C-B-A-A-B-A-B

after I've joined everything I crocheted in the round and decreased: (sc2tog, sc1) * for the first row, and sc2tog all sts of last row, bind off and leave a long yarn tail, hide all yarn ends of the single "hair curls" and use the long tail to sew it to the head.
You might like to stuff the single "hair curls", if you don't they would form a little closer to the head.

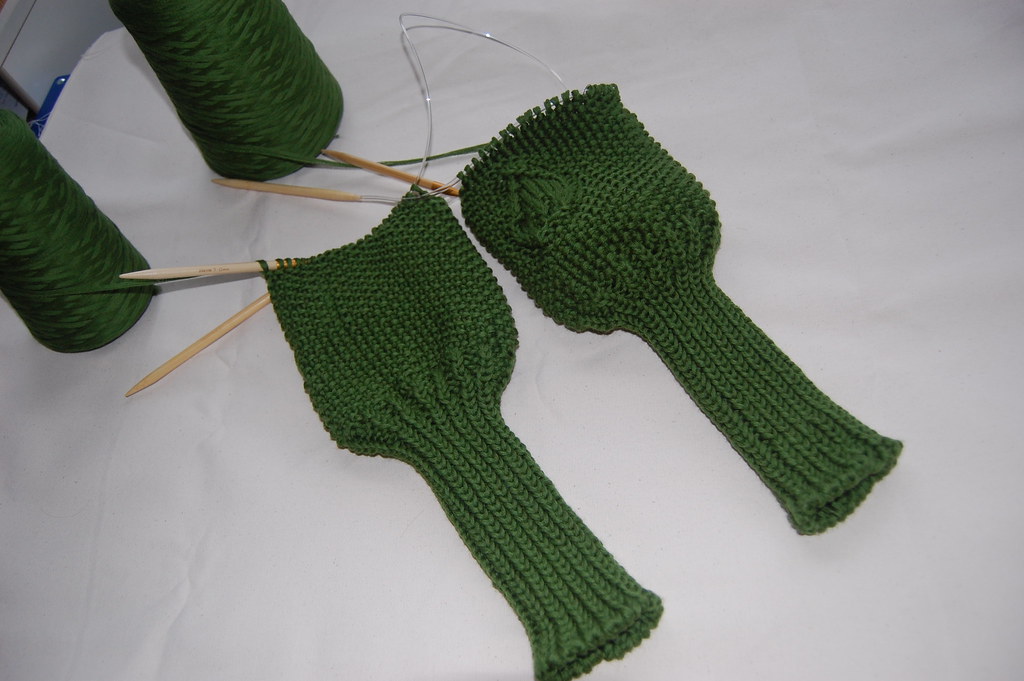
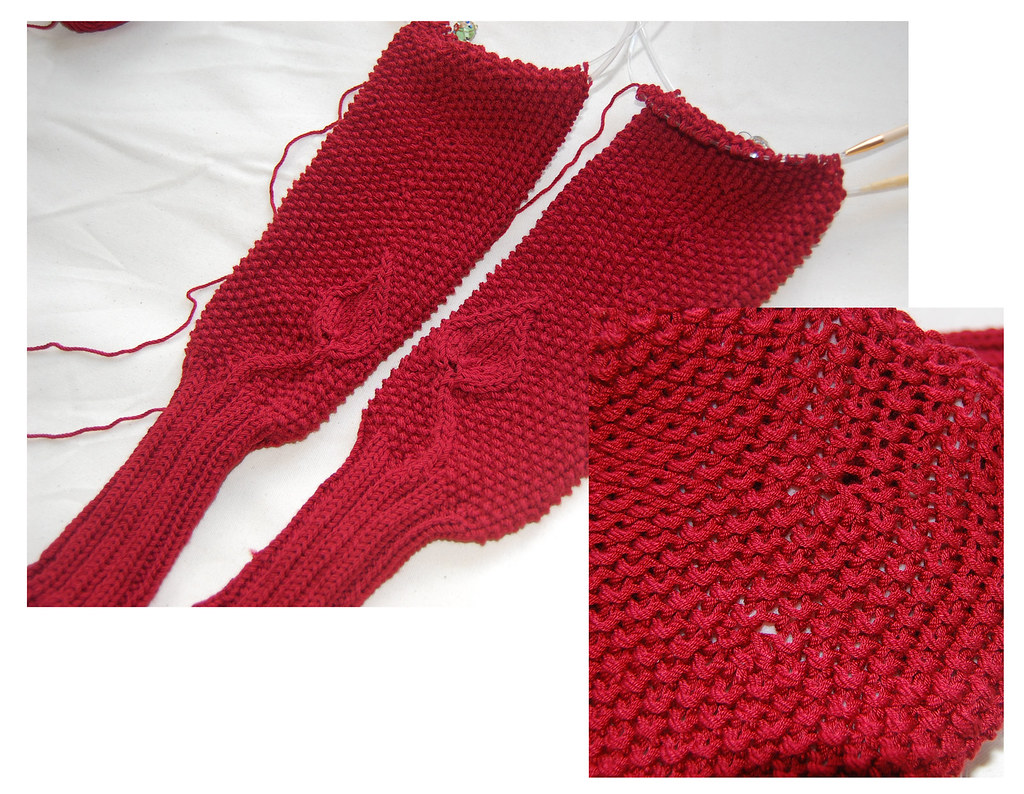
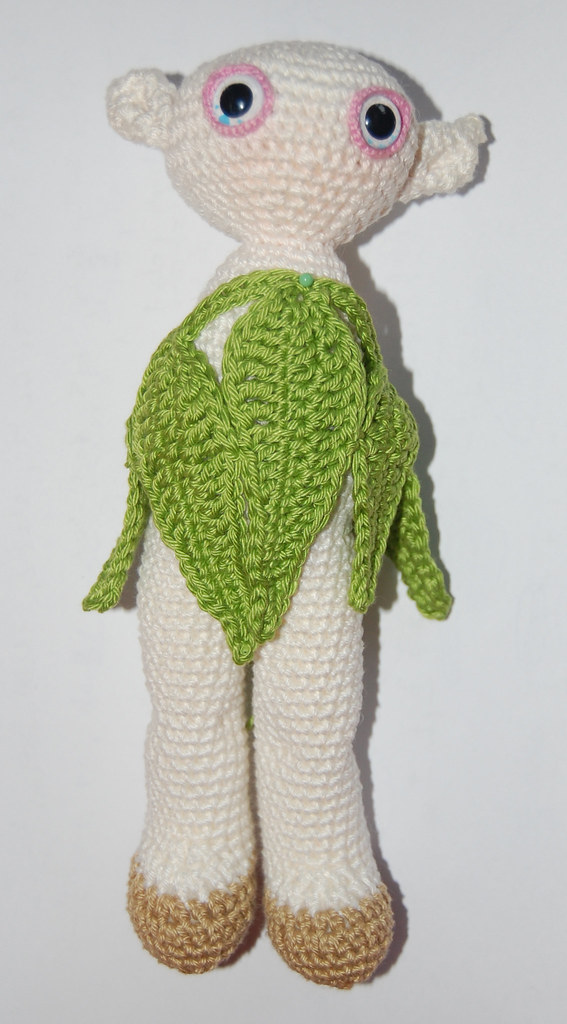
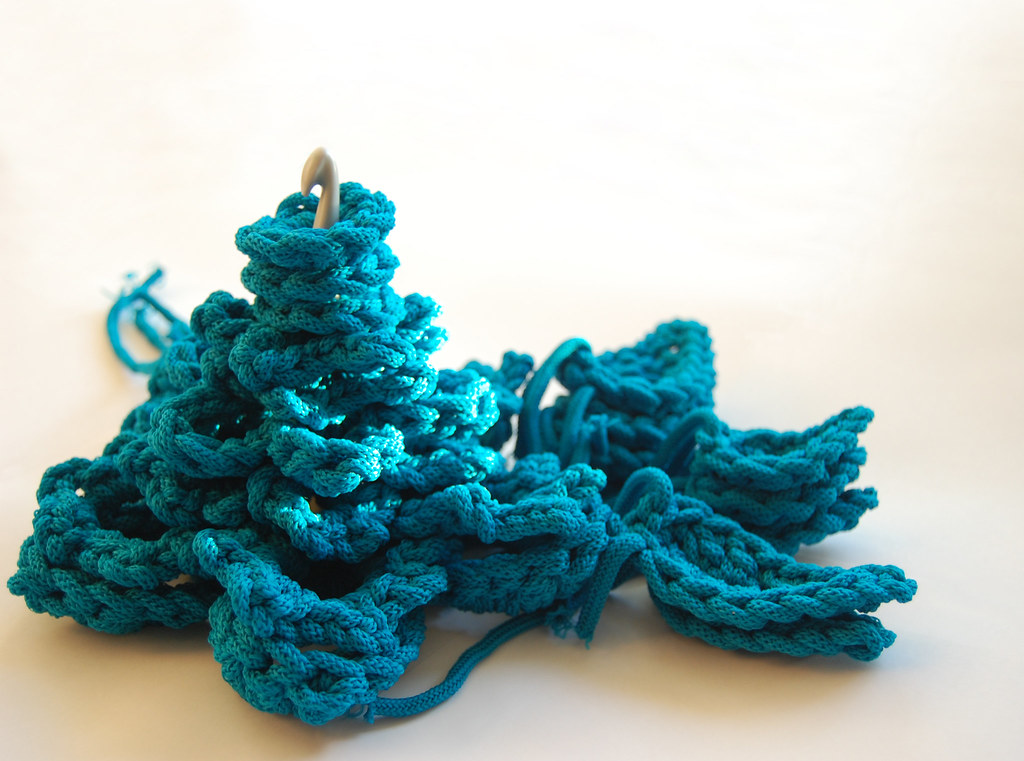
When crochting you can also make curly hair by adding bobbles as you go: start like you would for making the head of your doll and add bobbles as you go, every few stitches in more acurate way (every second row every 2nd st for example) or wherever it fits and you would like your bobble to be.

Another way for curly hair would be to add chained stitches:

Above you also can see my troll with a short haired curly wig.

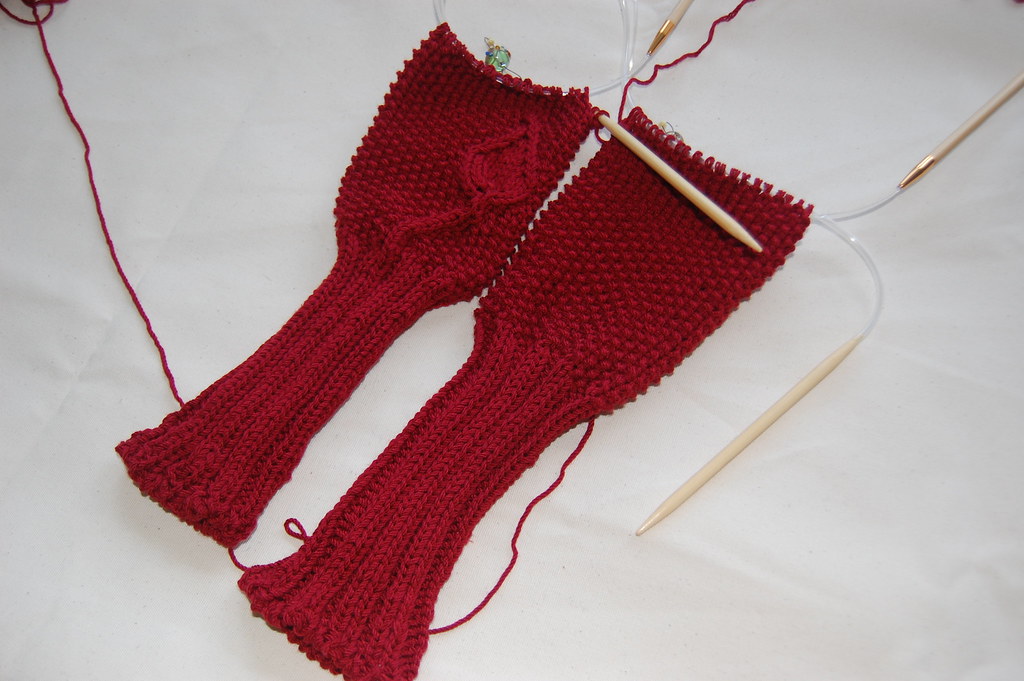
To make something like this:

1 -- start just like for a regular doll head
2 -- creating a hair: chain 6 sts, and starting in 2nd stitch from hook sc into the next 5 sts.
3 -- go on with the pattern of yourdolls head

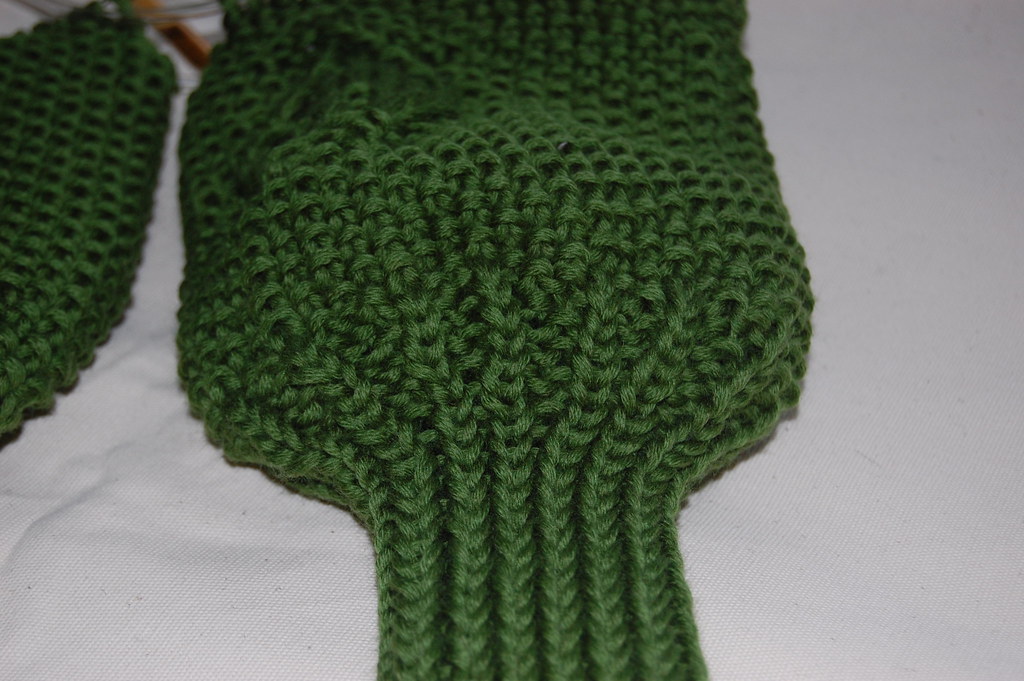
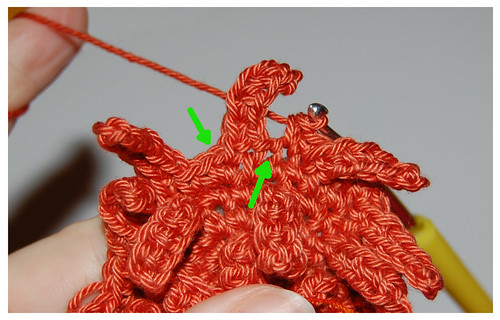
for this short haired version I made "hair" every 3 sts and every 2nd row. The row inbetween two "hair-rows" was very helpful to keep track of my sts. See the picture below for understanding the first stitch after a hair and the last stitch before a hair (green arrows). When you crochet around a hair take care that you hold the "hair" away from you, behind your yarn and hook.


When you elongate the chains they start curling automatically and might look like the hair of this beautiful bride, created by the lovely Adi (see her profile at flickr: slipstich)


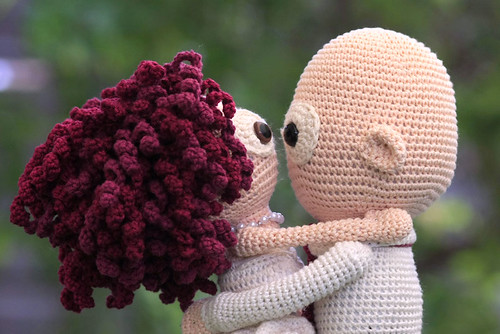
Adi also added that she made this couple for her sister's wedding invitation. Since she has lots of curly hair it took her almost a week to crochet the hair. The rest of the doll took 3 days....
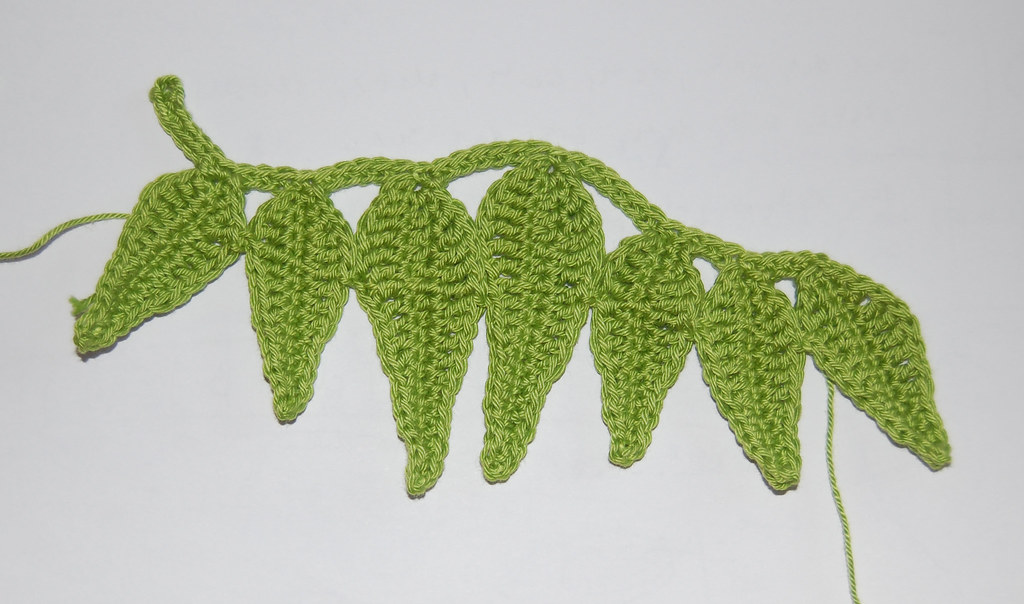
And these acurate curling curls were made a little bit different than mine:

Each curl is made of two rows:

1 -- chain 30 (more or less, depending on location)
2 -- 2x hdc in every second ch.

One more word on the width: never become bigger than the size of your dolls head. The wig / cap will stretch and therefore fit your doll. If you're not sure test the size as you go as often as you like. You might like to loosen your tension a little to be absolutely sure your hair will fit your dolls head.


embroidered haircuts

when you like embroidering you might like to prefer this method. It creates very neat and realistic hairstyles. You can add different colored spots to add even more reality to this dolls head.


Have a look at the beautiful dolls made by Mia (ravelry link). She also has written up a very detailed and informative tutorial on how you can create this type of hair. I couldn't do any better so have a look at this great tutorial.


fringe style hair


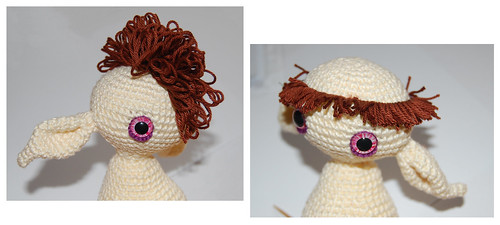
to make a fringe is a fantastic way to have really long hair, hair that you even could comb.

There are three ways to add hair like this: one would be a crocheted frindge (when making a new stitch hold a loop with your finger and continue to crochet). This works just like written above, you start like for a doll head and crochet in the round until your wig is finished. But there's a rub in it. I would not cut these fringes, they might come off too easily.

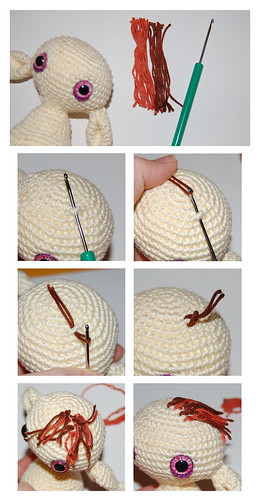
Another way is to add hair by hair: 
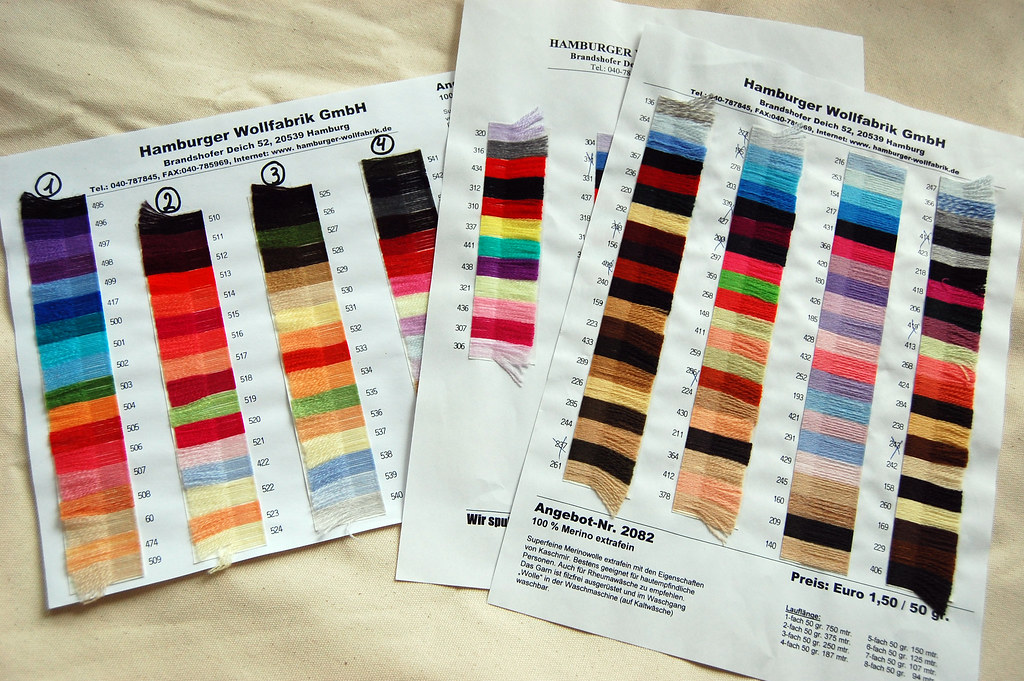
knotting. Knotting can create very long hair, since you cut your desired hair length before adding it to the head

Here's just a little example of how it might look. You can cut it and I think (I don't have long time experience with it) that a pure wool yarn might be better, it could felt a little and help keeping the single pieces of hair in place.

step by step pics:


Making a fringe with a lace loom is a real cool way that creates great hair for shorter hair cuts. Christen of Creepy Cute Crochet has written up a very handy tutorial for making a fringe with a lace loom.
I've tried it with a piece of card bord which I cutted to the size I wanted and it works very well:


_________________________________

I hope I added everything that's worth mentioning.
Many thanks to June, May, Adi, Mia and Christen

_________________________________

Please see my flickr pics on this tutorial for the big pictures