10/31/2009

10/30/2009

but it's all so exciting

everything is official now and I finally can tell you what's been happening here in the last months or what will happen in the next few weeks: I will move to Berlin! happy
why? because my new job is there! happy I quit from my job happy
It's all so exciting now, a new job, a new city, a new neighbourhood, new friends, new sky, a new flat to decorate, everything is sooo exciting. happy and it's a bit frightening too, leaving behind friends and my flat which I lived in for 10 years, will everything turn out good?

but all in all the last two weeks have been the happiest of the year! I have been grinning and singing and dancing and laughing happy

=^__^=


xoxo, Diana

10/22/2009

lucky

starting this cap I only knew the head circumference of the recipient and my gauge and after a first try, where I casted on for the exact head circumference I ripped out made a 'second' hat with a negetive ease of about an inch / 2 cm. And so it happend I casted on 144 stitches which (lucky me) is divided by six easily. See the beautiful outcome of the decreases? I like!


p.s. I like that much, I spent a few minutes thinking I might keep the hat, even though I would never where a black hat nor one with a symbol on front, no matter how big of a fan I am

10/20/2009

black is not nice!

I actually wanted to name this post: "the inside of a hat" but now that I knitted already more than just the facing and got to knit more with the black yarn that's making the actual hat I only find that knitting with black yarn is not nice, you don't really see what you are doing! I'm glad I only knit stockinette otherwise I might have frogged it already. The yarn is merino and knits awesome, but I didn't expect it differently =^__^=


btw. This is going to be a Prince hat for a friend of mine, a few days ago I found this cap on craft magazine and this friend of mine was screaming that he wants one - in black with a golden symbol! I don't really use the pattern in the link above, I use a thinner yarn and of course thinner needles, I refinded the symbol chart (I found the original looked a bit . . . well unbalanced) and I'll make a sewn shut facing (techknitter made a wonderful tutorial about this one).


In case you wonder about my snailigan - it grows, I finished the second sleeve and although I only increased a total of 6 more stitches, it fits a lot better. Now I'm about to frog (aka rip out) the first sleeve and worry about pilling and of course re-knit the first sleeve.


_______________

ooh, and don't forget to get your copy of Betty Bat,
it's only free for one more day

10/17/2009

merino heaven

on wednesday I had a day off and the took the opportunity to make a trip to hamburgs yarn factory (Hamburger Wollfabrik). I wanted to buy a few yarns and colors to make some winter hats and mittens and also some gaiters to warm my feet. And beeing there I sort of forgot that yarn is money too and was like: "200g of that color, and 200g of that one over there - oooh that color is cute, it will match perfectly with this yarn. I'll take 400 g." - - all in all I came home with more that 2.5 kg!!!

10/13/2009

Betty Bat - Pattern

and there it is, my little special something for this years Halloween:


Betty Bat


This pattern can be made within 3 hours, so be quick and tell everyone you think might be interested! Betty spreads 13 cm or about 5 inches when made with yarn that requires a 3.5 mm hook. You will also need 12 mm safety eyes, have a look at the 'how to paint safety eyes' tutorial here.

Hope you enjoy this little pattern and maybe you can send me a few pics of your finished Betty Bats.


and last but not least: The link to download
download now

sadly the week is over, but you can still get your copy of Betty Bat

USD 3.50
add to cart --- show cart

10/07/2009

announcing a booo!


it's still a secret but I am sure you will like it.
From october 13th 'til october 21st you can download my little halloween sepcial here for free!
It will match you're halloween decoration extremely well and you've seen it on this blog before. You can crochet it and it will take you only a few hours to make it.
so check it out.

-

boooo-ooooh

10/04/2009

How to amigurumi - neat bind off

it's been about time to make a new tutorial and this time it's about binding off, we already know how to start an amigurumi and how to add new colors or how to shape.

I will divide this post into two parts: first how to bind off open ends / open body parts, like arms or details like eyes and the second part will be on how to close the final hole of a doll.
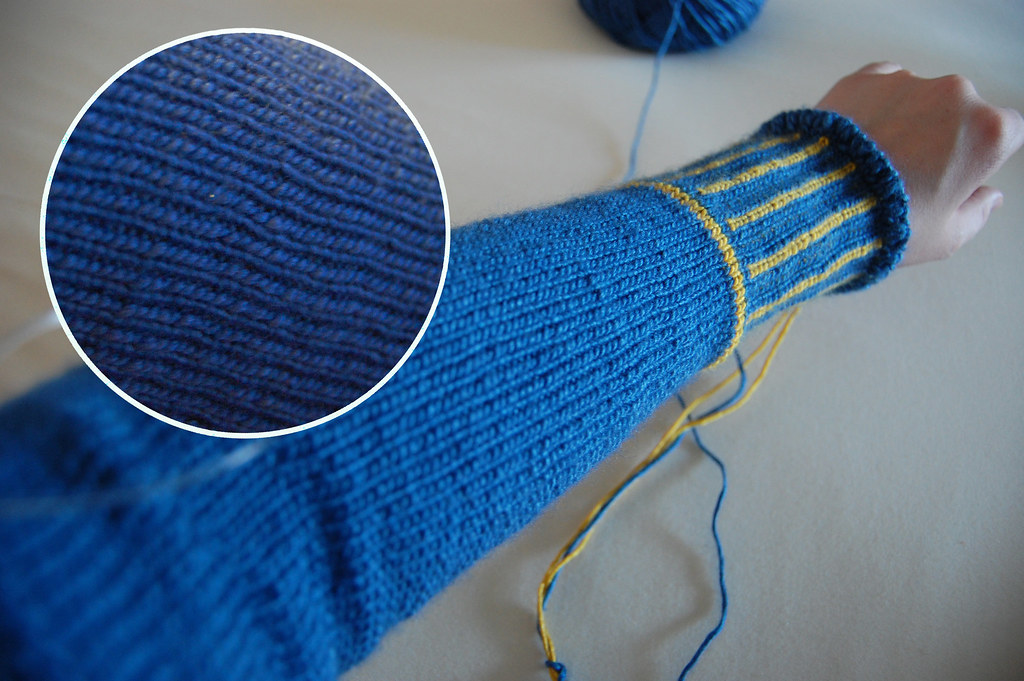
bind off open ends:

when crocheting in spirals or in other words without joining every round and making a single crochet to reach the level for the next row there is a little "bump" at the very end of the row.

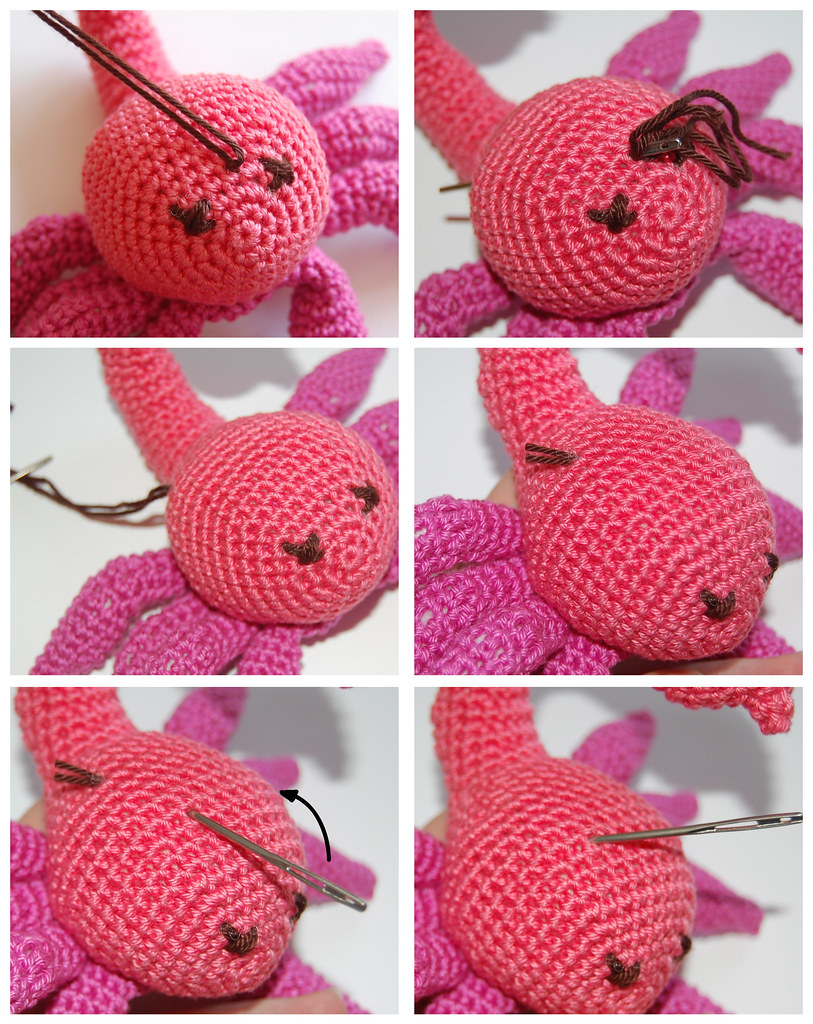
But this "bumpiness" can be hidden very easily. To hide the last stitch at "open" body parts such as ears or maybe arms and legs, and snouts that you often can find in one of my patterns you use a simple trick: a slip stitch that will not be drawn closed but sewn closed.

To end a row this way you make a slip stitch after you've made the last stitch that's required by the pattern.

Now pull the yarn through the slip stitch but don't pull the slip stitch tight yet, just cut the yarn (often it's good to cut it long enough so you can sew on the body part to the doll you just made) and thread the yarn end onto a darning needle. Now I "seam" the yarn end:


- insert the needle into the next stitch from the outside to the inside of your body part

- don't pull tight

- now lead the needle through the back loop of your slip stitch (from below up) and pull through

- pull the yarn end a little

- and now insert the needle into the stitch you used in the first step but this time from inside out

- pull the yarn tight (but don't too tight)

and that's it!

the slip stitch blends into the main fabric very smoothly and can't be recognized very easily.


binding off / closing final holes:

to close the final hole of a doll I use a slip stitch bind off as decribed above and add a few more steps:


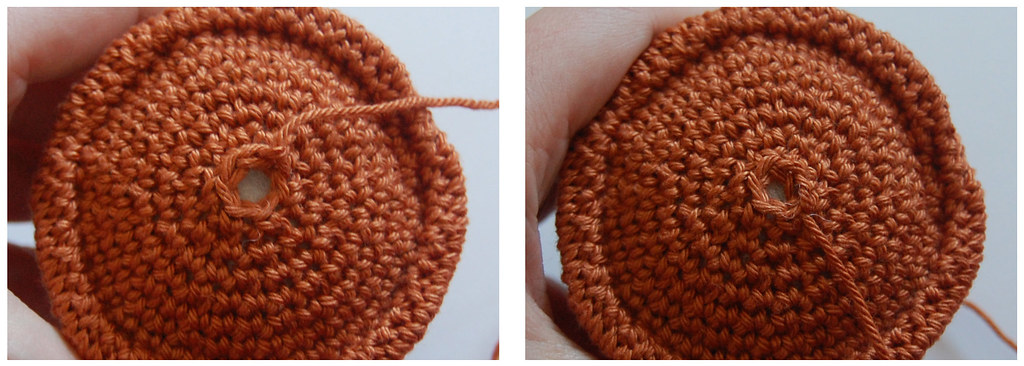
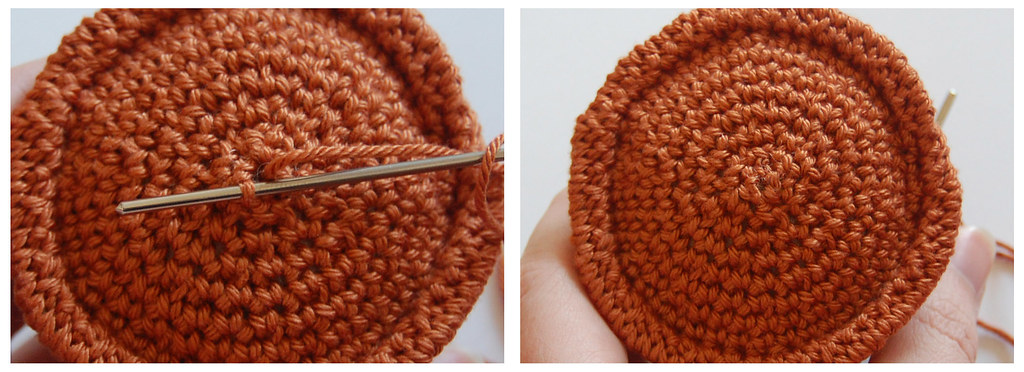
- I use the yarn end to pull all the remaining stitches "inside" or better I force them to face each other: use the yarn and needle and insert the needle from the inside to the outside of every stitch around. This makes the stitches face each other and also helps securing the yarn end.


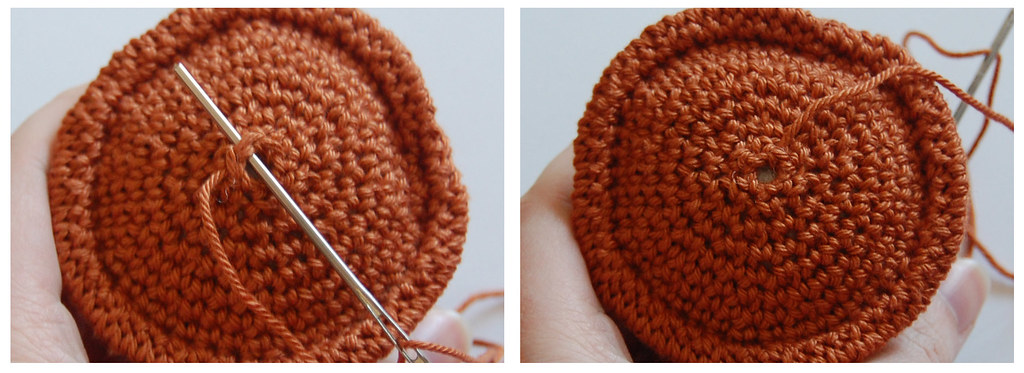
- an additional step is to thread your needle through the seam you just made to pull the hole of the doll closed completely:


______________


a general tip for securing yarn ends is to hide them inside your doll and secure them / knot them with other yarn ends.
I often use facing yarn ends to knot with each other (such as eyes) and hide both the knot and the yarn ends themselves inside the doll.


10/01/2009

to frog or not to frog

what a question. I'm thinking about frogging my first sleeve. It turned out tight, not too tight just a bit tight. It still gives in a lot and doesn't feel tight or anything I just don't feel very comfortable with how it looks when worn. I mean you can see the spaces between the knit stitches and that sort of bothers me.


I think I will start the second sleeve now and give it a few extra increases and than will check which I like better.


p.s. on sunday I will post a new amigurumi tutorial on how to bind off neatly. And I also plan a little Halloween special, so stay tuned =^__^=