click on the pictures to see them bigger
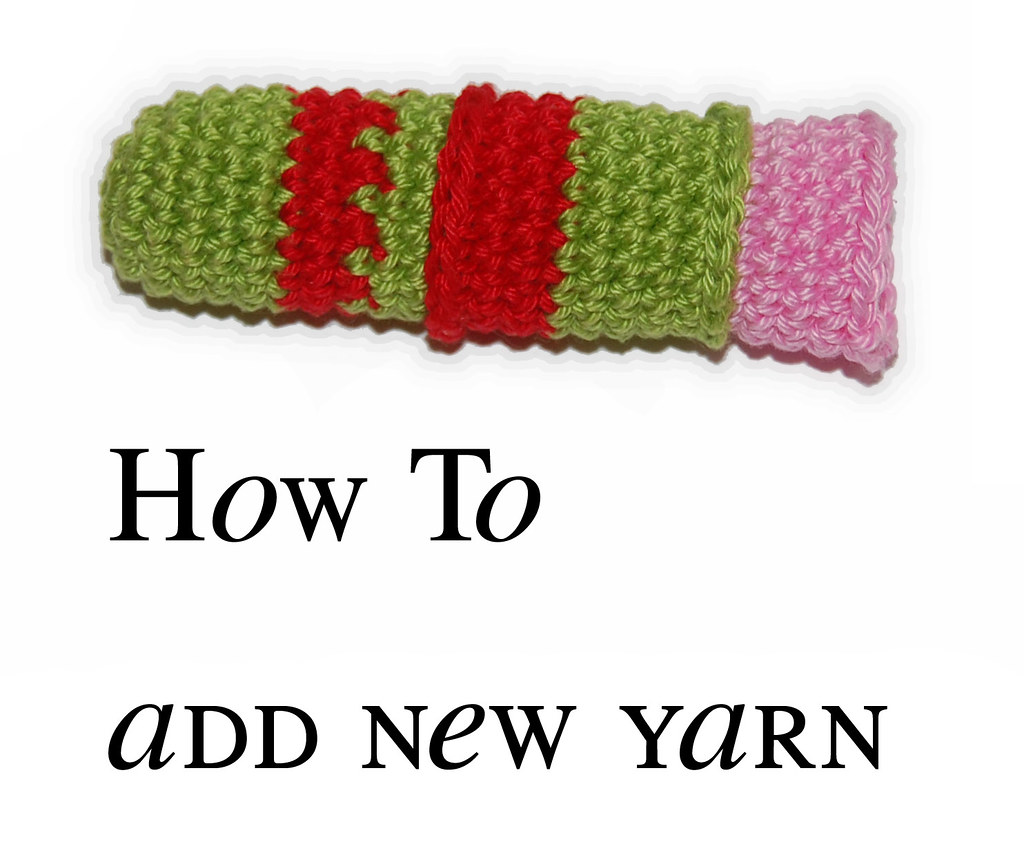
there are alot of ways to add a new color or simply a new ball of yarn to your work, a few I will show here.
the simplest will be making a knot.
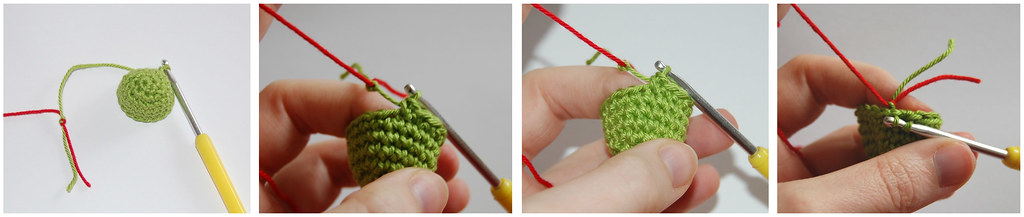

making a knot is super for adding a new ball of yarn when you run out of the old one. When you make the knot and get close to the point where you will continue with the new color make sure the knot will stay inside your doll (picture 4 of 4 above). So if for example you find yourself in a situation when you might pull the knot through the loops to the front - unravel a few stitches and work them again, only this time work a little tighter. This will give you enough yarn to leave the knot behind your stitches.
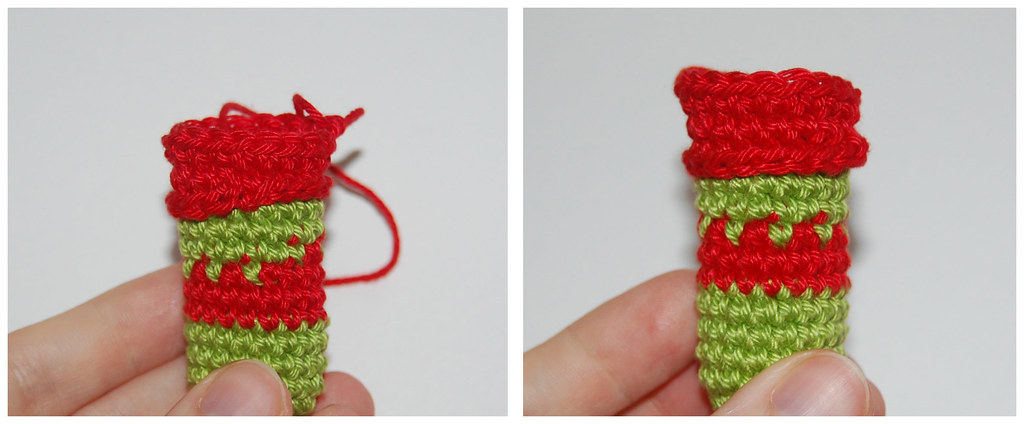
When you want to add a new color you get a pretty smooth color break but the areas where you added the new yarn can build some sort of "ladder" to avoid this you can alternate both colors (the new one and the old one) with every stitch. This will create a wavy look and blend better at starting areas. See the picture below to see clearly what I mean, on the left side you can see where the new color started. The crossing fits into the whole wavy character of the new rounds. One example on a doll you can see here: the troll.
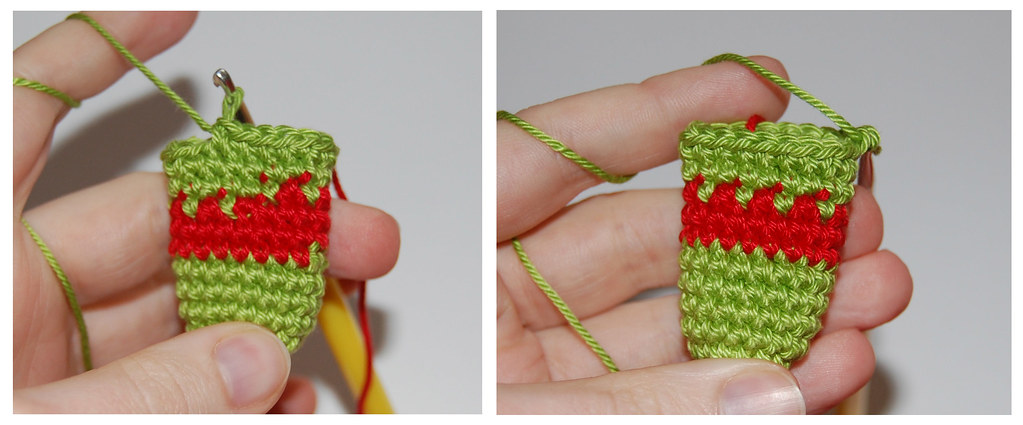
Here you can see how to alternate the sitches. Take care to not work too tight. Also it's a little fiddly to knot the new color to the old one. When you finished the round you can either cut the old yarn and secure the end (for example by hiding it inside the next stitches) or let it drop and get back to it later when you want to change the color again on a later stage of your doll.
the simplest will be making a knot.
making a knot is super for adding a new ball of yarn when you run out of the old one. When you make the knot and get close to the point where you will continue with the new color make sure the knot will stay inside your doll (picture 4 of 4 above). So if for example you find yourself in a situation when you might pull the knot through the loops to the front - unravel a few stitches and work them again, only this time work a little tighter. This will give you enough yarn to leave the knot behind your stitches.
When you want to add a new color you get a pretty smooth color break but the areas where you added the new yarn can build some sort of "ladder" to avoid this you can alternate both colors (the new one and the old one) with every stitch. This will create a wavy look and blend better at starting areas. See the picture below to see clearly what I mean, on the left side you can see where the new color started. The crossing fits into the whole wavy character of the new rounds. One example on a doll you can see here: the troll.
Here you can see how to alternate the sitches. Take care to not work too tight. Also it's a little fiddly to knot the new color to the old one. When you finished the round you can either cut the old yarn and secure the end (for example by hiding it inside the next stitches) or let it drop and get back to it later when you want to change the color again on a later stage of your doll.
_____________________
The next two methods will blend the uneven color change you receive when you don't alternate the stitches. It's also a very good way to start the beginning of clothes or shoes. The direction in which you crochet your doll or your doll parts will decide which method to choose. You can either let the new color cover the old one, like for the shoes in this picture where I crocheted upside down or let the old color cover the new one like pictured here where the shirts blend into trousers.
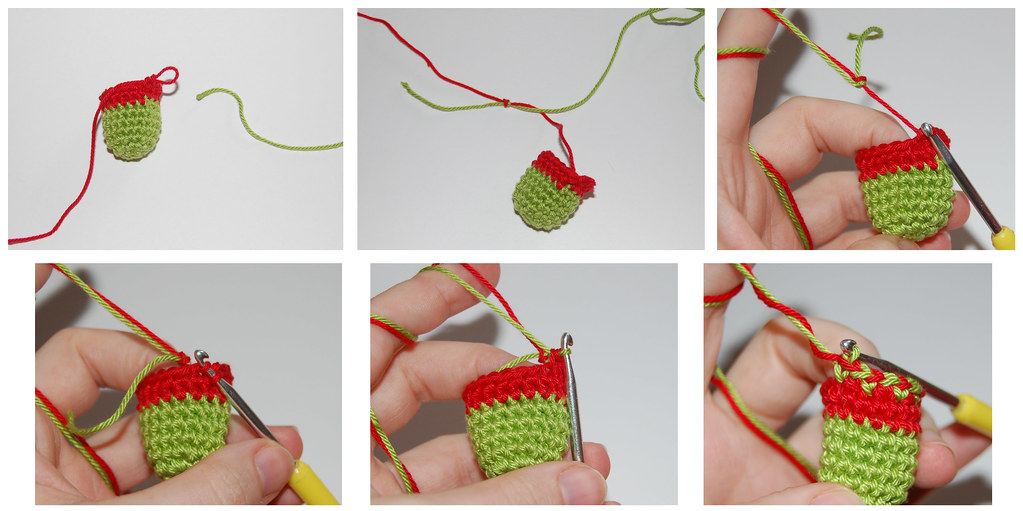
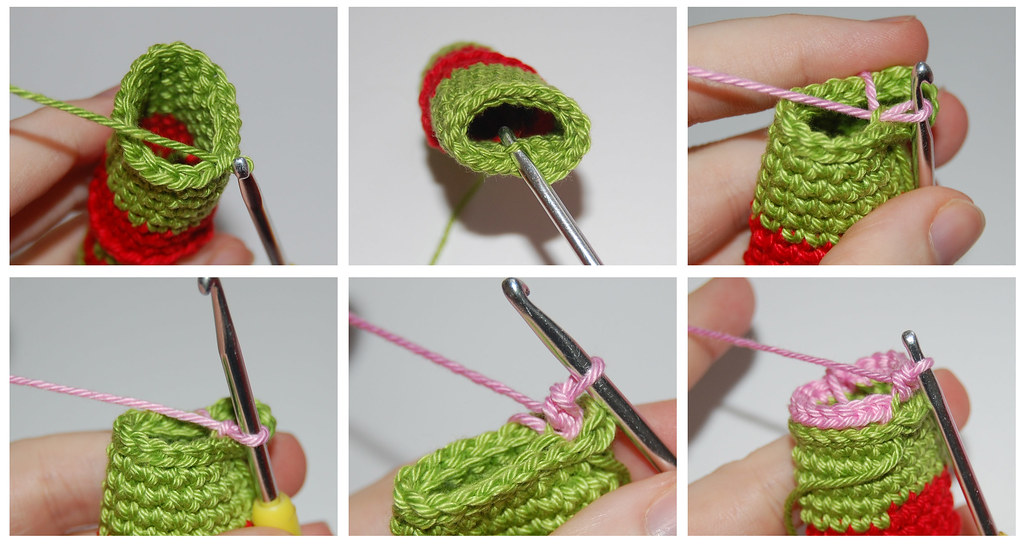
new color covers the old one: In this case red above green. On the picture below you can see how this can look. I like it better than the next method because it's smoother and you don't risk to work too tight.
Before you can add the new ball of yarn, you need to make a chain. Chain as many stitches as you made in the last round with your old color PLUS one stich. Here I have a tube of 18 stitches around so I made a chain of 19 stitches. Now I put the doll piece back onto my hook (picture 2) and make the next stitches through the chain AND the doll fabric. To have the loopy side facing you, you will need to use the little loop on the backside of your chain (picture 3 and 4). Now start crocheting: push your hook through this "behind" loop [only for the first stitch: start in the second chain from the hook] and through the next stitch of your doll (pic 5), pull the yarn through (pic 6) and finish the (for example) single crochet stitch by pulling the yarn through all remaining loops on your hook (pic 7). From now on you continue like your pattern tells you to (always through chain and doll fabric, pictures 8-10). The arrow in picture 9 shows you the first stitch of the second round.

To blend the beginning simply thread the yarn end onto a darning needle, push it through the loops facing you and into your doll, here you can secure it by making a knot with the yarn end of the old color (pictures 11, 12)
This next method is showing you the other way round: The old color covers the new one: green above pink

This method is a little easier than the method described above, simply because you will not need to start with an extra chain. To prepare the blending effect you decide in which row you want the color break to be. Then you continue with your current yarn by crocheting only into the front loops of your doll farbic (picture 1) for one round and binding this color off. To add the new color you will now only use the back loops. To add the new color: push into the first back loop of your doll fabric and pull up a loop (pic 3). Chain one (pic 4) to secure the loop and make a single crochet into the SAME stitch you just pulled up the first loop through (pic 5). Continue working into the back loops (picture 6) and when you finished the first full round continue a spiral like your pattern tells you to.
In this example I made slip stitches to receive the same blending effect as in the method described above. When you make single crochet stitches instead you can easily turn this method into a way to add the brim of throusers or the end of a shirt to your doll. Keep in mind here to increase stitches in the next rounds with your "old" yarn, the shirt color, to keep it from being too tight, or to decrease a few stitches in the next rounds with your new yarn, the fabric or body color below your shirt to prevent the same "too tight" effect.
new color covers the old one: In this case red above green. On the picture below you can see how this can look. I like it better than the next method because it's smoother and you don't risk to work too tight.
Before you can add the new ball of yarn, you need to make a chain. Chain as many stitches as you made in the last round with your old color PLUS one stich. Here I have a tube of 18 stitches around so I made a chain of 19 stitches. Now I put the doll piece back onto my hook (picture 2) and make the next stitches through the chain AND the doll fabric. To have the loopy side facing you, you will need to use the little loop on the backside of your chain (picture 3 and 4). Now start crocheting: push your hook through this "behind" loop [only for the first stitch: start in the second chain from the hook] and through the next stitch of your doll (pic 5), pull the yarn through (pic 6) and finish the (for example) single crochet stitch by pulling the yarn through all remaining loops on your hook (pic 7). From now on you continue like your pattern tells you to (always through chain and doll fabric, pictures 8-10). The arrow in picture 9 shows you the first stitch of the second round.
To blend the beginning simply thread the yarn end onto a darning needle, push it through the loops facing you and into your doll, here you can secure it by making a knot with the yarn end of the old color (pictures 11, 12)
This next method is showing you the other way round: The old color covers the new one: green above pink
This method is a little easier than the method described above, simply because you will not need to start with an extra chain. To prepare the blending effect you decide in which row you want the color break to be. Then you continue with your current yarn by crocheting only into the front loops of your doll farbic (picture 1) for one round and binding this color off. To add the new color you will now only use the back loops. To add the new color: push into the first back loop of your doll fabric and pull up a loop (pic 3). Chain one (pic 4) to secure the loop and make a single crochet into the SAME stitch you just pulled up the first loop through (pic 5). Continue working into the back loops (picture 6) and when you finished the first full round continue a spiral like your pattern tells you to.
In this example I made slip stitches to receive the same blending effect as in the method described above. When you make single crochet stitches instead you can easily turn this method into a way to add the brim of throusers or the end of a shirt to your doll. Keep in mind here to increase stitches in the next rounds with your "old" yarn, the shirt color, to keep it from being too tight, or to decrease a few stitches in the next rounds with your new yarn, the fabric or body color below your shirt to prevent the same "too tight" effect.
Very nice tutorial with some methods I haven't seen before. I shared it with the We Love Amigurumi group on LiveJournal. Thanks!
AntwortenLöschen