10/16/2011

Ludwig Pattern - at last

Hi my loves, I know you waited and waited and waited and now it's finally done :)

Ludwig Pattern finished

Ludwig has gotten his mane (just in time for the winter season) and the pattern is all written up.
You will find the download link below. I will keep this pattern a freebe until New Year's so if you ever want to work it, download now ;)

p.s. I find he looks like Lionel Richie in the "Hello" video, what do you think?

download now

10/11/2011

Aaaaaargh

Aargh - not as much pirate like but more in a dammit what happened way.
Time is running so fast, I have no idea what happened. It's already autumn out there and Ludwig still is mane-less (even though a man would really warm his head).
Well during the last couple of weeks I worked like crazy and needed to travel a good amount of the time (I would share pictures of hotel rooms, but you know what they say: a hotel bed is a hotel bed is a hotel bed). Then I got sick (pretty bad cold with fever and everything) and now I have a week off and decided to let you guys know what's up over here and finally post the last bits of the Ludwig pattern and now it's raining like crazy, it's all dark and grey and I can't take proper pictures for the pattern. It almost seems like the universe doesn't want me to finish this particular pattern...

I do my best! I promise

because I feel so bad for not letting you know what's going on, during a last few weeks I got plenty new subscribers (hi everybody ^__^) and they didn't had anything new to read, I mean you subscribe to a blog and you want to READ, don't you? And all my loyal "old" subscribers didn't have anything to do around here as well, I am so sorry! And all of you who wrote, thanks alot, I'm really doing fine, it's just time flying by soooo fast, I mean it's autumn by now, I even made candles yesterday, because you know, when it's cold outside you want a cuddly home ( I have no idea where to place them, in my new flat I seem to miss candle area, but I will sure find something sooner or later)

so again, I feel bad for being so quiet and Ludwig will have hair ASAP

hugs, Diana

9/05/2011

Be Late For Something Day

Modern living and society puts incredible pressures on us to meet challenging deadlines, observe rules and regulations, and to regulate our lives by tight schedules. Wouldn't it be nice if you could just stop for a little bit and see what happens?
Be Late For Something Day encourages you to take a step back from your schedule and intentionally be late for something – remember that things can go on without you, and maybe it’s not all quite as important as you thought; after all, you need some ‘me time’!

In 1956, Les Waas founded Procrastinators’ Club of America. Shortly after, the club’s committee designated September 5 as Be Late for Something Day to promote the positive parts of procrastination. “Most people think they don’t have time to stop and smell the roses—this day tries to alleviate that factor,” Waas says.

found here and here

my dear friend Garfield is pretty good at this:


and as I am not very good at this my life drowns in work the last couple of days and Ludwig will have to wait a bit longer to have hair, sorry for the delay

8/21/2011

mysteriously walking

so Ludwig can grow further, I didn't take pictures yet but you can give him arms and legs now and Hey a little Mystery in a CAL is never wrong, right? ^__^

new pattern part: download now

typo: on page 5, row 4 of arms it should read: (sc5, m2) x3

8/19/2011

oh

sorry for my absence for Ludwig, I'm in bed with a cold and don't feel like crocheting at all, instead I sleep, drink gazillions of peppermint tea, watch DVDs and knitted a bit. Mindless, non-thinking, straight forward knitting, and although I'm in bed for almost four days now I didn't made much progress:


snowcapped_1


it's a cowl, so I don't catch a new cowl immediately ;P

8/14/2011

Ludwig update

the next part of the Ludwig pattern can be downloaded now :) ravelry should have sent the update automatically but in case it didn't you can download it here:

download now

it includes the facial details you can see in the last post. I play along with hair/mane styles in the meantime - there are quite a few ways it can be done :)

oh this is so much fun, I almost had forgotten how much it is, thank you all

8/12/2011

Peekaboo - I see you

ludwig2

mew or roar?
a little glimpse at the next part of the CAL pattern, which I will make available on Sunday :)

8/10/2011

Ludwig CAL starts now

so the CAL starts right away :)

this is what you will receive with the first part of the pattern:

ludwig 1


the lions head and body and, of course with a behind (which is facing us in this picture) ^__^

you can download the pattern here:

download now

or you can go to ravelry and start the pattern, you will get the new pattern automatically there when I update it :) also you can add comments/questions/pictures at my rav group, I will interact there and answer every question that might occur :)

of course you can also share your comments here as well ^__^

now get your hook ready and choose a color for your lion because I can't wait to meet your lion kings :)

oh, before I forget to mention, next part of the pattern will follow on sunday

8/08/2011

Ludwig

when I created the "pattern" page for my CAL at ravelry I needed to name my lion, and since I tend to give my creatures human-like names and I wanted to name my lion something starting with an "L" the first name coming to my mind was Ludwig, quick decision the pattern would be Ludwig, the lion ... but then I started thinking about the name and it turns out Ludwig is a must-have-name for lions, I mean another famous Ludwig with lion like hair was van Beethoven:


and just think of Ludwig XIV - the sun king as well, I mean royal and sunny ;)


Ludwig is for lions ^__^


*pictures taking from wikipedia.com

8/07/2011

let's crochet along

who wants to join me? I want to make a lion, simple, cute and little . . . testing a few hair styles, or mane styles in this case ^__^
in case you want to join, I will put up a ravelry pattern for the CAL and update it as I go, maybe you want to share you're pics here as well, or in case of questions or comments or chatting or anything really

I think I will start the CAL in midweek, so keep you're hooks ready

lion_CAL1

7/31/2011

how to - make your amis arms and legs move

The classic amigurumis arms or legs are either sewn on or crocheted to the body (like my trolls or 
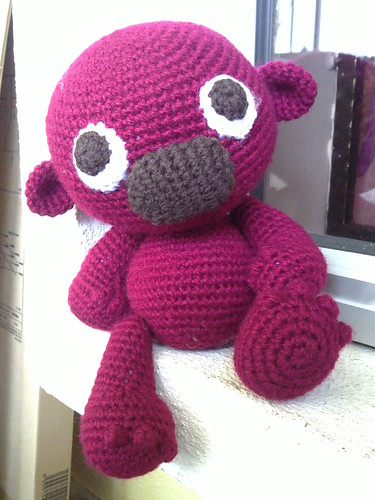
critters). Some dolls even have arms or legs that are part of the body (like my fairies or human like dolls).
But then you find a pattern for a doll and find that you would like to have this doll with movable arms or legs so you can pose your doll; Barney is a doll that's been designed with arms and legs that are movable.

Today I want to show you how to use classic bear joints for your amigurumi dolls and I want to show you how to create a neat alternative in case you don't want to use classic joints (maybe you can't find them or they don't fit)

Classic bear joints are most often three- or sometimes four-piece joints. They can contain disks and washers and wobble pins or nut and bolts, some joints resemble classic safety eyes:


classic joints 1


you could even use safety eyes as joints

___________


now, how do you install them? the standard method would be to place one part of the joint inside your dolls body and the matching part into the arm or leg:


classic joints 2


1 - crochet all legs and arms before crocheting the body
2 - don't stuff just yet
3 - add one part of the joint to the e.g. leg: place one disk/disk with shank inside the leg, position it at the inside of the leg, add the washer and bolt resp. washer and wobble pin by pushing the pin or bolt through your material
4 - stuff
5 - close leg (maybe crochet the last row and bind off)

sources for classic joints:
mohairbearmakingsupplies.co.uk
the lovely Clara from 6060 on etsy
there are plenty other resources as well

___________


The alternative to this classic joints would be what I would call "button-joints". Sometimes classic joints are really hard to find or (which I found to be a problem) they just don't fit through two layers of crocheted fabric. Another reason to search for an alternative would be the size of the classic joints would be either too small or too big for your dolls arms or legs.
The "button joint" can be easily adapted to solve any of this problems. Pick smaller buttons to fit small arms/legs, you can find buttons everywhere (I like to use those blouse-buttons that I would keep in case I would ever need them again, but of couse never did) and since you're using yarn to built the joint you can use it for the thickest fabrics as well.


what you need and what the button joint will look like:

button joint

buttons (find some that fit into arms and legs easily, you can choose bigger ones for the body) and yarn or other tear-proof thread like fishing line.


how to do it:

1 - prepare your buttons: cut yarn or fishing line to pieces of about 10"/25cm and pull them through your buttons as pictured
2 - pull the fishing line/yarn ends through one layer of your leg/arm, be careful to position at the inner side of each arm/leg, so you don't accidentally will receive arms or legs that face the wrong way
3 - stuff
4 - finish leg or arm (crochet last round and bind off, hide yarn ends)

button joint 2


5 - now find the position on your dolls body where the arms/ legs will be attached
6 - pull the fishing line/yarn ends which are coming from the inside of an arm or leg through an hole in your bodys fabric
7 - push a button over the yarn/fishing line ends (space them evenly)
8 - tie knot (fix with a drop of glue if you like to make it extra secure)

button joint 3


Again it's very helpful to crochet the arms/legs before you start the body, this way you can add the prepared arms and legs when needed and stuff and finish the body afterwards.

I like this method very much and will use it again on other dolls. I also was very surprised that the button-joint was a lot less wonky than I had expected.

Hope you liked this tutorial and find it useful,
take care
Diana

7/28/2011

[Bloggy] ... don't tell anyone but I noticed Diana's putting together another tutorial and it will be on Amigurumi ... don't tell her, I told you ... shush


OH, Bloggy will you stop spoiling my readers? darn and how come you think I wouldn't see that you post here? after all you are my Bloggy-Blog

^__^

7/23/2011

Tutorial - felt wine rack

I always liked the idea of these cute felt wine racks that hold 6 bottles but found their price a little too much when I believed it was an easy craft project. And since I'm cooking risottos and soups that require wine like crazy lately I use up quite a lot of white wine (I don't drink any so I never felt the need for a wine rack before, but now I can see a use for it, at least for a small one)


tutorial - wine rack 1


and as it turns out the project was an easy one:

tutorial - wine rack 2
what you need
thick felt, paper for a pattern, a ruler, a cutter and chalk to transfer the pattern, and some yarn and a needle to sew everything together


tutorial - wine rack 3
first make a basic pattern on paper (you will use 13 cm/5" for each bottle plus 1cm/o.5" as seam allowance at each outer edge, so in this case: 1cm seam + 2 bottles (2x13cm) + 1cm seam; if you want to make it bigger just add 13cm for each bottle) - I found 17cm/6.75" to be a good depth for the wine rack - in the end my pattern measured 28cm x 17cm - now just transfer the pattern to the felt using the chalk


tutorial - rack 4
cut four pieces of felt to the size of your pattern (two pieces of felt for each row of wine bottles) using the cutter and the ruler


tutorial - wine rack 5
mark the middle on every piece of felt and sew two pieces together, repeat until all felt pieces are used up


tutorial - wine rack 6
now mark the middle of the "wine sections" but don't forget to add the seam allowance, I marked at 7.5cm from the outer edge in - sew together to make it look like this:
tutorial - wine rack 7


tutorial - wine rack 8
almost finished: mark the 1cm for the seam at the outer edge of the upper and lower felt pieces and sew together so it will look like the following picture:
tutorial - wine rack 9


the main idea of sewing everything together is to start in the very center of your wine rack to be able to reach every seam without breaking your fingers
you can easily adapt this pattern for wine racks that will hold 6 bottles or even 9 or 12 (3 rows of wine with 3 or 4 bottles)
and you don't need to use thick felt if you can't find any (I found mine on ebay) I believe a nice classic fabric that's properly lined can make lovely wine racks as well, it just may take a little longer (it took me about 2 hours to finish my wine rack)


have fun, Diana

7/19/2011

Before Bloggy starts complaining again ...

... I will post a few pictures of knitting, finished knitting to be more precise.

Me? Complaining? I AM NEVER COMPLAINING, I'm the most quiet blog anyone could wish for ..rolls eyes.. although I would LOVE to see knitting pictures, I haven't seen some in a while, those acorns just don't count, really

Bloggy? will you calm down? you're such a diva

calm down? DIVA? ..rolls eyes again.. I only want more crafting here ... just saying

... anyways, the knitting I'm talking about is my "Chinese Christmas" pulllover I made last year. I finished it just after new years and even got my friend Alex to take pictures, I just never seem to have shown you the finished piece.

chinese christmas 7

chinese christmas 6

chinese christmas 5

chinese christmas 4

chinese christmas 3

chinese christmas 2

chinese christmas 1


unfortunately it felted a little after the first washing in the washing machine, not toooo bad, but the pattern got lost a tad

7/17/2011

google +

I just got invited to google+ and I'm kind of exited - yay

anyone of you already there? any experiences so far? any cool circles I should enter?

yay

7/15/2011

I feel like a chipmunk...

decke


being on vacation and with the colder weather I found some time for knitting ... and I do feel the need to eat some nuts

7/03/2011

recalling the week

|seen| tiger lilies |heard| too many Depeche Mode songs |read| part 2 of "The Legend of the Ice People" books by Margit Sandemo |done| a bike tour at the stormy Baltic Sea |eaten| spaghetti with creamy cauliflower sauce ... yumyum ... and too much licorice |drunk| water |thought| of knitting a new silken cardigan |been pleased| with my tomatoes |got annoyed| by the changing weather |wished| for a storm proof umbrella |bought| a brown summer dress by Esprit |clicked| youtube videos |been astonished| how quiet Bloggy has been the last days


... ha ha ha, me being quiet? you kept writing and I kept reading, although I wonder how the afghan keeps growing ... hugs Bloggy


and hugs from me as well, Diana ^__^

7/01/2011

at the beach

with this title you might think I've been on vacation but I just got home from a 3 day workshop in a hotel near the beach, this was our view at the first evening only 2 minutes walk away from the hotel

thebeach

the rest of the time it was stormy and rainy and you could think we were glad we had to work instead of having a free time at the beach ^__^ nice weekend everyone

6/28/2011

dinner

dinner


Bloggy, I made a fantastic spaghetti sauce with cauliflower yesterday and the lemon juice really does the trick. The recipe can be found here and I will definitely make this again, I loooove cauliflower with breadcrumbs and I loooove pasta, now I can have both at the same time ^__^

6/19/2011

the knitting and a pizza

oh, Bloggy, your last comment was a bit rude, don't you think? Readers do you agree with me? wasn't Bloggy a little snappish?
But Bloggy, you know I'm nice and will show you more of my knitting now. It is lace, sort of, as you suspected. I'm knitting an afghan with a very pretty lace pattern by Herbert Niebling (link to his ravelry pattern page). It's his "Eichenlaub" (oakleaves) and I'm using worsted weight yarn instead of lace weight because ever since I've seen the Hemlock Ring Blanket I decided that any beautiful doily/lace/shawl pattern could be turned into an unique afghan/throw by changing yarn weight. And there I go now knitting a warming throw for my couch in the middle of summer heat.


knitting1


and I made pizza today, I'm still getting used to my new oven and this pizza turned out better than any before it. I'm admitting I feel a little proud.


6/13/2011

just for you

Bloggy, this next few pictures are just for you, I just took my camera and made a few snapshots of my balcony, you see it's pretty green there

balcony 1

and do you see the tomatoes? I love the fact that I have tomatoes this year, how do you like it?

oh, and also my knitting:

knitting 1


hugs,
Diana


_______


THAT'S you're knitting? What is it? I mean don't get me wrong, I appreciate that you took the time and made pictures, and your balcony looks inviting! but that picture of the knitting is bad. I have no idea what I see. I believe it could be lace, sort of, in case the pattern below belongs to the knitting above, but then the yarn is pretty bulky, soooo .... is it lace?

regards,
Bloggy

6/12/2011

Bloggy again

.... ooh you're growing tomatoes? Maybe I would like to see that, I didn't know you could do such things. What is your balcony looking now? you know, it's not like I could just stand up, walk around and take a look myself, I'm sort of attached to your computer ... And what are you knitting anyways?

take care,
Bloggy

well

Hi Bloggy,

well .. I don't really know where to start [scratching my head], I didn't meant to hurt your feelings, I didn't know you had feelings, for you have always been so quiet and shy and you always, always held your peace. But I am sorry, really, let me apologize. And didn't even know what kept me so long, I mean you are right I did knit a little next to you on my sofa, not much though, only a little, summer came around and with the warm weather yarn isn't as joyful as it is in winter, but still I like you and the summer isn't much of an explanation, is it? Also life just happened to be there and work and everything, I started jogging and I learned how to prune tomatoes and I decorated my balcony, I enjoy my balcony alot lately, this year I will have food there !! yay
I also spent a bit of time on youtube, I even found a video on procrastinating and I was reminded of you and then I felt guilty for not even visiting you to say "hi" and I just couldn't come around for I was believing you might not like me anymore and that's how I was away, I also read alot, like the Hunger Games trilogy (which was very very good, by the way), I was sort of busy I guess ...

anyways I will promise to better care for you, honestly, I don't like that you felt all left alone and neglected.

hugs,
Diana

6/11/2011

hello?

Hello Diana,

this is your blog saying Hi. I was just wondering what you're doing, I mean you didn't come visit me for a while nor did you post anything. I don't want to complain or anything but I do feel a bit lonely here ... all alone. Sometimes I think I can hear you knit, I could swear I could hear metal needles clicking, and I think "cool she will come post something soon" but then you don't. Diana, I feel neglected, please come visit me soon. I'm sure you're readers feel similar.

Yours sincerely,
Bloggy Blog

2/23/2011

overwhelming cuteness

last time I wrote I told you I asked some lovely ladies over on ravelry to test the pattern for Barney, I even made a group so we could chat and invited others to fill the group with more life
and today I want to show you the super cute outcomes of this testing, all bears are soooooo awesome! I have been on a congress the last weekend and when I came home I found these bears and they made my evening so perfect! but enough said the bears:


Barney Bear


I especially love how placing the ears and eyes differently gave him a completely different expression!

2/20/2011

Barney Bear - the pattern

Meet Barney, he's the cutest bear you will ever have the joy to create. Barney is designed with movable arms and legs so you can play with him and position him the way you like (click here for a tutorial). He also can be your little personal guardian by adding cute little wings, which are included with the pattern as well.


barney bear


USD 6.50
add to cart --- show cart

Crochet pattern in pdf format, designed for a E / 3.5mm hook and worsted weight yarn, written out in plain English.

This pattern provides a stitch-by-stitch guide.

This pattern is for the intermediate crocheter or an advanced beginner with knowledge of crocheting in the round, increasing and decreasing. Special stitches are explained particularly.

Using a E / 3.5mm hook and the apropriated yarn you should receive a bear about 7 inches / 18 cm high.

But keep in mind that the size of a finished doll strongly hinges on your yarn and hook.

2/06/2011

prototype finished

yes, yes, yes .... finally I finished Barney, my sweet bear.


this is a bad picture taking with my mobile in bad light conditions but I wanted to share anyways, he's done!!! and he's got wings too!!!
Now I'm writing down the pattern and will test it once more, also will look out for a tester over at ravelry


and those of you who called for naming him Barney, I will contact you tomorrow :o) congrats

1/20/2011

KNITTING

it lightens your day after a tough one on the road! coming home, feeling almost ready for bed, opening the mail and what did I find? the missing skein for my pullover!!!

yeah!!

off to wind a yummy ball and knit a few rows ...

1/16/2011

Happy New Year

a little late but coming from my heart!

Over the Christmas and New Years Holidays I knitted like crazy, last time I was here I showed you the swatch I made and from this swatch I made this sweet pullover:


chinese winter 011


I used the chinese lace pattern from Barbara Walkers second treasury book and because I knitted most of it over Christmas I called it Chinese Christmas, just logical right? I really like the outcome, it fits great, only thing is I ran out of yarn, I emailed the company which is normally only sending a minimum of 500 gram per color and yarn and hope they will be so kind and make an exception for me.


chinese winter 012
close up