just a quick note, I'm still here, I have a seriuous case of knitting fever. I learned a lot with these new stockings, will tell more when I can think more than K-N-I-T . . . so far I can understand those sock addicts now, you can actually finish a pair of socks within a weekend. ONE weekend. a PAIR of socks. Mine grow into knee highs meanwhile. So my knitting mojo is calling and I'm back on the couch.
4/27/2009
4/22/2009
kiss my swatch, please
hilarious, isn't it? Yesterday I saw this sentence on someones ravatar at ravelry and it made my day. Today I use it as the title to this post because I started swatching for a new project. A stocking in lovely blue. It will be my first toe up sock and I already learned about Judy Beckers Magic Cast On which doesn't look very complicated, the only thing I miss, since I don't have a pattern and need to try out everything is how do do the increases. I don't mean which increase to you, I'm thinking about the kfb but I also might try the "knit the bar" M1. I wonder about how many increases per round will feel comfortably. Cuff down I can try it on and decide that it's about time to close the toes or to decrease less per round but toe up I don't have any experience to learn from. At the moment I'm still testing my pattern, it still feels a little uneven to me.

p.s. swatching in the round makes great wrist warmers
p.p.s. I'm putting the finishing touches to my little critters pattern at the moment.

p.s. swatching in the round makes great wrist warmers
p.p.s. I'm putting the finishing touches to my little critters pattern at the moment.
4/19/2009
a FO long awaited and the lucky winners
finished object first.

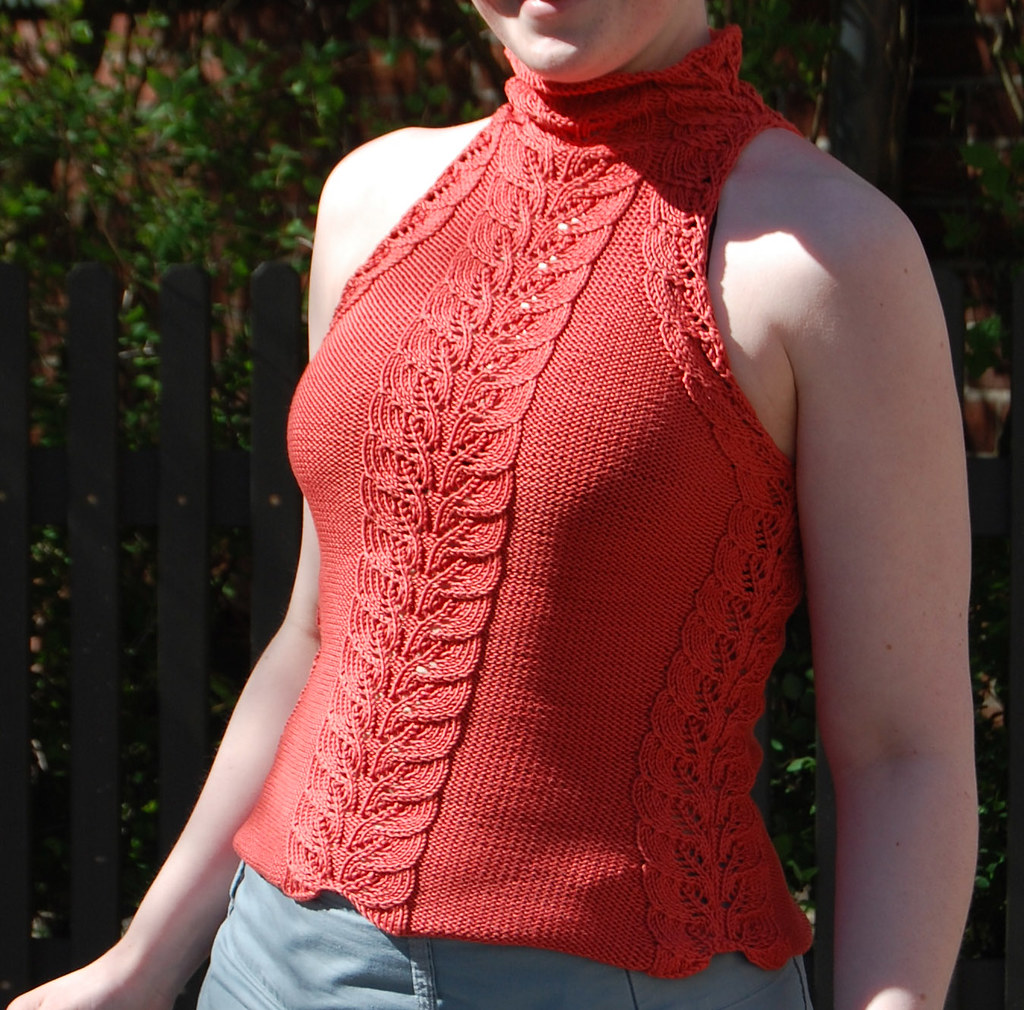
pattern: Leaf Panel Top - KK246 by Karabella Yarns
yarn: ONline Linie 11 Alpha
needles: US 6 / 4.0 mm
started: may 2007
finished: april 2009
yarn: ONline Linie 11 Alpha
needles: US 6 / 4.0 mm
started: may 2007
finished: april 2009
notes: I had this top lying in my closet for almost two years. o__O
To realize this was a bit of a shock to me. It was more or less finished two years ago, made all the knitting, washed and bocked it but never started to close the side seams. Yesterday I finally did and I start to wonder why I let this sit for so long, I mean almost 24 month, nearly 700 days - 700!!!
I'm tempted to promise myself to never ever ignore something for so long again, but I know myself - it might happen.
and now the lucky winners of my blogoversary giveaway:

that is

Thank you all who joined and left a lovely comment. Hope you will continue to enjoy this place as much as I do.
4/18/2009
giraffe crossing
at the moment I'm in a "don't start anything new before you haven't finished your stuff" mood. It's gotten pretty warm outside and I like to wear my knee highs with my skirts and dresses instead of those pantyhoses that stand for winter weather but I only have bought knee highs in my closet so the need to finally finish my handknit pieces is unavoidable. You might remember my waterfall socks if you started reading here about a year ago. And to become aware I have this u.f.o. lying around here for almost a whole year makes me feel bad (not to mention I don't have a clue exactly where I have put this u.f.o.). Besides this I want to knit attitude I also really want to sew something, a new dress or a new skirt and matching top - ever since I wrote about it here the thought didn't leave my head and keeps popping up every time I see the sun in the clear blue sky.
But I need to cross-stitch patches onto a giraffes head, sew on ears and add eyes to a blind monkey.

p.s. don't forget to enter your name to my blogiversary giveaway, today is your last chance, because tomorrow I will reveal the lucky winners.
But I need to cross-stitch patches onto a giraffes head, sew on ears and add eyes to a blind monkey.

p.s. don't forget to enter your name to my blogiversary giveaway, today is your last chance, because tomorrow I will reveal the lucky winners.
4/17/2009
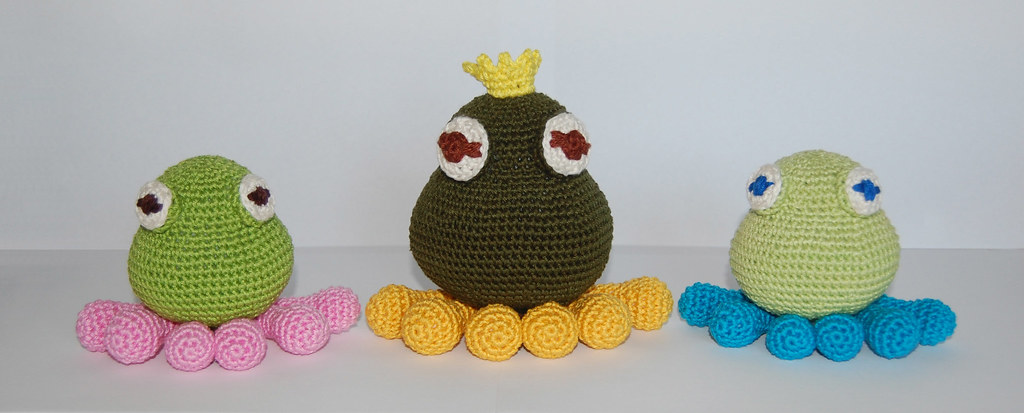
frog prince and king pattern
as promised I finished the frog pattern today =^__^=


USD 6.50
add to cart --- show cart The pattern comes with directions for two sizes. The frog prince and his father if you want so.
as always the pattern comes in printer friendly black and white with detailed drawing like pictures.
these frogs will make great toys for children, since all you need is yarn and stuffing!
Crochet pattern in pdf format, designed for a E / 3.5mm hook and worsted weight yarn and written out in plain English.
This pattern provides a stitch-by-stitch guide.
This pattern is for the advanced beginner with knowledge of crocheting in the round, increasing, and decreasing. Special stitches are explained particularly.
Using a E / 3.5mm hook and the apropriated yarn you should receive a frog 4 to 5 inches high depending on which size you choose.
But keep in mind that the size of a finished doll strongly hinges on your yarn and needle.
4/16/2009
parade the king
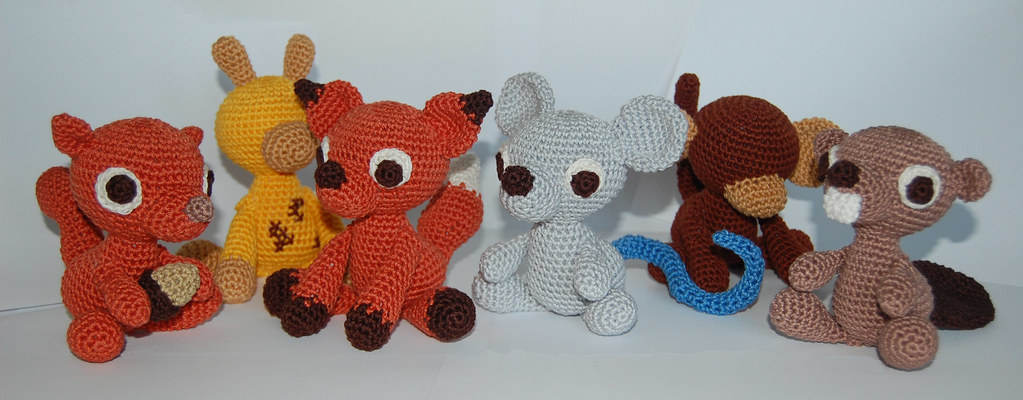
these little critters are almost done, all are made from one basic pattern. I hope to finish it this weekend . . .
and now, even though two of them are still blind they came to parade the king. Frog King got a crown. The pattern is done, I'm only adding a few pictures and tomorrow afternoon you can find a link here
=^__^=
and now I am off to bed, I'm so tired I could sleep standing againt the wall - good night and sweet dreams everybody
4/13/2009
totem pole
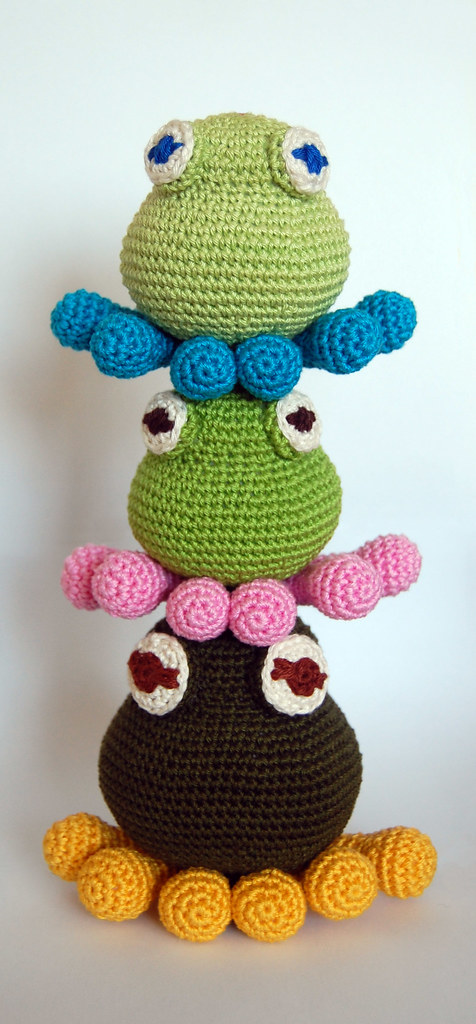
A few weeks ago I showed you big feet and today I can show you the rest of the frog. I finished the little one in the middle two days ago. It will be a birthday present for a dear friend of mine but it felt so hard to give it away I made the upper blue feet frog for myself. They are both smaller versions of my Frog Prince Wagner and about the size of medium sized apples. Both measure 3.25" high. From toe to toe they measure about 5". Wagner, the former prince and now the frog king (of course) is 4" high and measures 5.5" from toe to toe. I started writing a pattern for both of them and doing so I made an original version as well. That's the dark green frog at the bottom of this frog pole. With its yellow feet it reminds me of Super Mario Bombs.
I think I can publish the pattern within a week, as well as the one for the little critters. Making the eyes is still a bit difficult but I think I found a solution. So don't forget to post to the blogoversary giveaway if you like to have one of these patterns, maybe you will be one of the lucky ones.
a few more pictures
4/12/2009
Happy Easter

Felices Pascuas!
Buona Pasqua!
Joyeuses Pâques!
Kellemes Húsvétot!
Hau`oli Pakoa!
Glad Påsk!
Happy Easter!
Frohe Ostern!
Buona Pasqua!
Joyeuses Pâques!
Kellemes Húsvétot!
Hau`oli Pakoa!
Glad Påsk!
Happy Easter!
Frohe Ostern!
4/11/2009
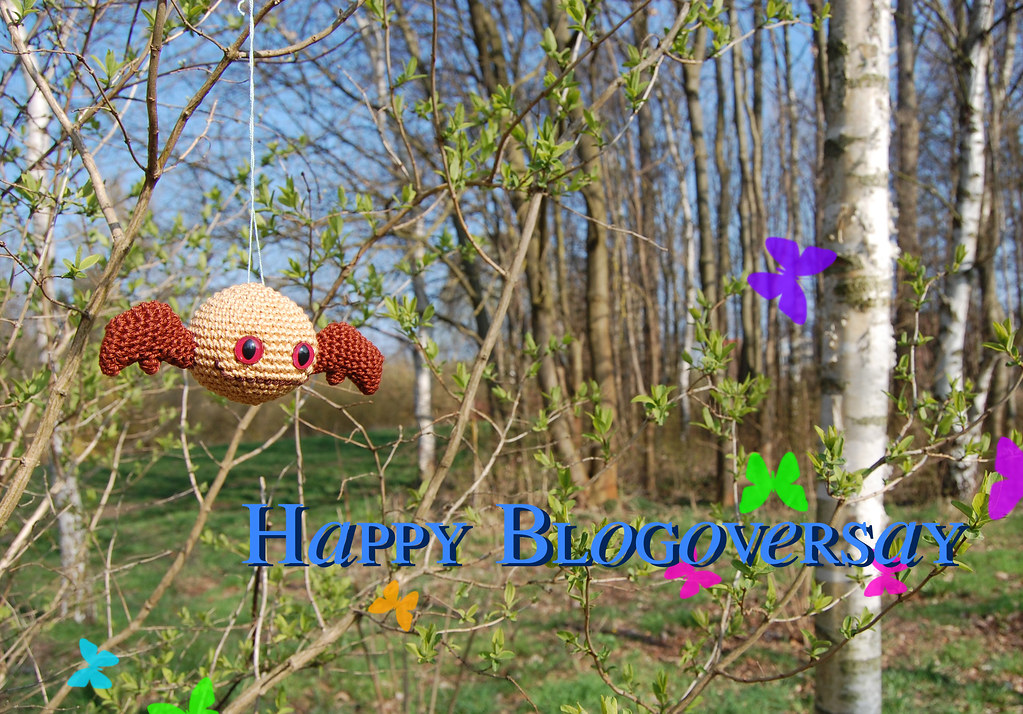
Happy Blogoversary Giveaway
it's two years now that I started blogging and I stil love it. When I first realized my blogoversary was creeping closer I couldn't think of how to celebrate or if to celebrate at all. I don't REALLY celebrate such things. But this blog is special to me. My readers are special to me. This is my happy place and sometimes when life gets "weird" and throws lemons at me I come here and make lemonade.
=^__^=
to celebrate this day I decided to have a giveaway, it's my second year and so there will be two lucky winners who get two prizes: free choice of any two patterns I have available.
Post to this post within a week (until april 18th) and the two winners will get the patterns of their choice via email.
Post to this post within a week (until april 18th) and the two winners will get the patterns of their choice via email.
4/09/2009
easter prep emergency
every so often we don't realize it's christmas until it IS christmas. Same thing with easter. No decoration yet, no cakes baked.
I don't have a small one running up and down the house so I don't really NEED to decorate and hide easter eggs and prepare some cute games but I love to decorate for easter. I started strolling in the park next by and watch spring coming closer with huge steps. Buds and flowers popping up everywhere. Smile on peoples faces, the sun getting warmer every day. GREAT. So easter is coming closer and I thouht I'd share some lovely tutorials I found on some of my favorite blogs.
One of them is LollyChops. She makes really cute stuff and has made quite a few bunny and eatser themed posts lately (guess she loves springtime and easter as much as I do). One of the tutorials she shares is for these beautiful easter eggs. These are the most beautiful eggs I have seen this year and the how-to looks like I can do this too.

Another thing you should have when easter time is aproching is easter baskets. Reading the craft magazine blog I came across this lovely instruction for a woven baskets that I have made when I was a child. Lovely memories.

This woven basket is easy to do. One little tip from me, when you make the cuts into the folded paper make sure to make the cuts a little (only a little) bit longer than the width of the matching part. It's easier to weave if you don't need to squeeze the last strips into each other.
The following two baskets I found via Folding Trees.


last but not least: chocolate easter eggs with peanut butter filling. Found on Baking Bites.

yummy! - happy easter!

yummy! - happy easter!
4/07/2009
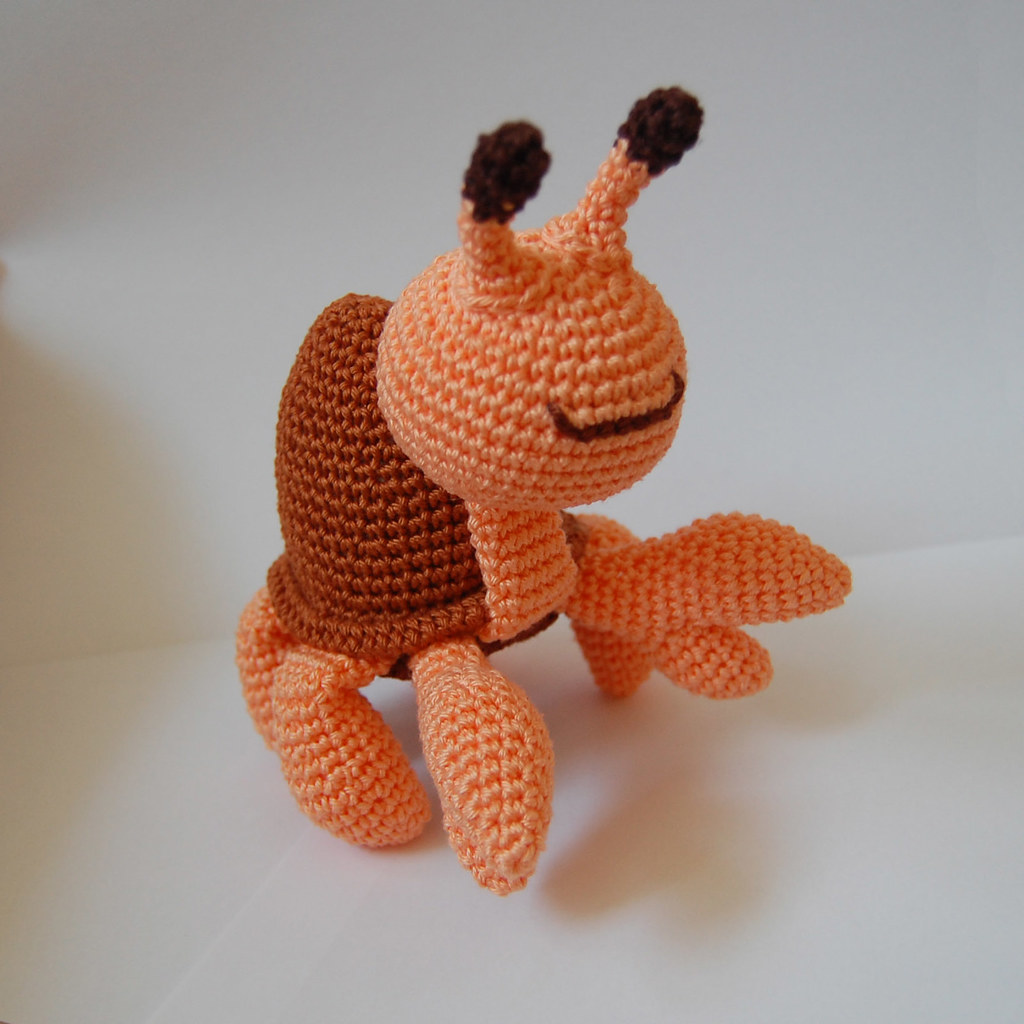
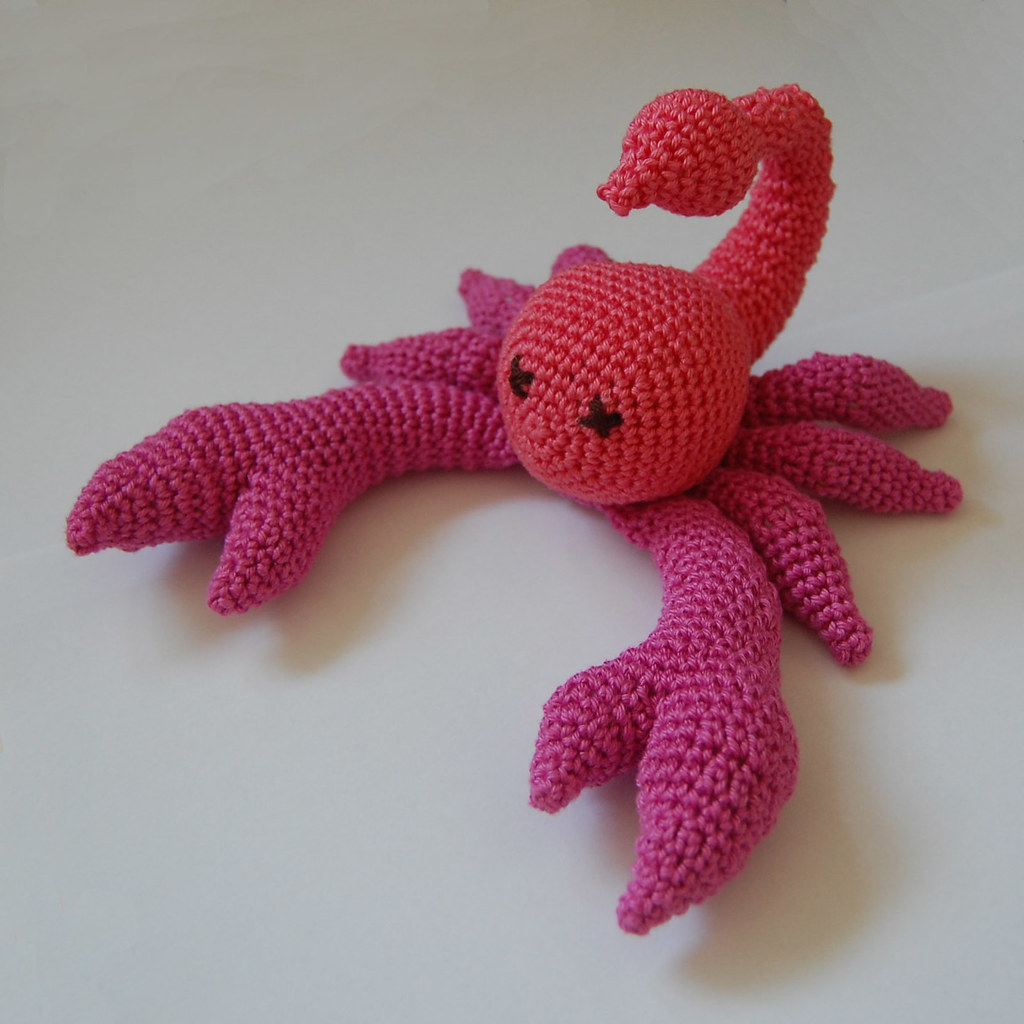
piercing duo
last week I had some trouble with a scorpion who didn't have enough legs. This week I finished him and his new best friend the hermit crab as well. Scorpion has dark pink legs now just like his pedipalps and hermit crab disguises in orange and brown. They're both custom orders and already packed waiting for me to go to the post office, waving them good bye a last time.


Strangely enough I always miss my little creatures when they leave me - but I'm not crying now - only one more day at work and I have six days off, easter holidays! And a good time to finish my little critters (the pattern and the dolls) as well.
Strangely enough I always miss my little creatures when they leave me - but I'm not crying now - only one more day at work and I have six days off, easter holidays! And a good time to finish my little critters (the pattern and the dolls) as well.
4/06/2009
marsupialia shop
as mentioned in my last post I went to Berlin this weekend and enjoyed the shop opening of my blog friends from the Beuteltiere.

The opening was cool. The shop is so sweet and figuring from the pictures (the tons of pictures!!!) from their flickr page the party at the evening was a blast! I missed it to catch my train back home, but I had a great day in our sunny capital. The shop is pretty cute, a bit smaller than I imagined but charming and the handbags they offer are amazing. If I had a strong yearning for bags I wouldn't have left without some to call my own now.
so, if you live in Berlin and like bags, individual ones that not everybody else will carry you should go there
4/03/2009
sunny weekends everybody
two tutorials a day, now if this isn't a smooth way to start the weekend I don't know what!
I'm going to Berlin tomorrow to check out the shop opening of two of my dearest blog friends, Katrin and Barbara

let me copy and paste from their blog invitation:
Dear Beuteltiere friends and confederates,
long waiting comes to an end.... the Beuteltiere are opening!
All of you are cordially invited to go on the prowl for new bags and accessories in our Shop(Raumerstrasse 19, 10437 Berlin) Saturday, April 4th 2009.
The doors are open for guests from 11 am and having a glass sparkling wine in your hand you can enjoy sneaking around.
Kick-off for the first Beuteltiere-theme "Cherryblossom festival" will be at 8 pm. Prelude will be the introduction of our new discoveries and their makers. Gorgeous bags, pouches, softies ..... exciting exemplars as far as the Beuteltier can see.
Proudly presenting and enormous excited,
the Beuteltiere Katrin and Barbara
HOW TO - what's in the box
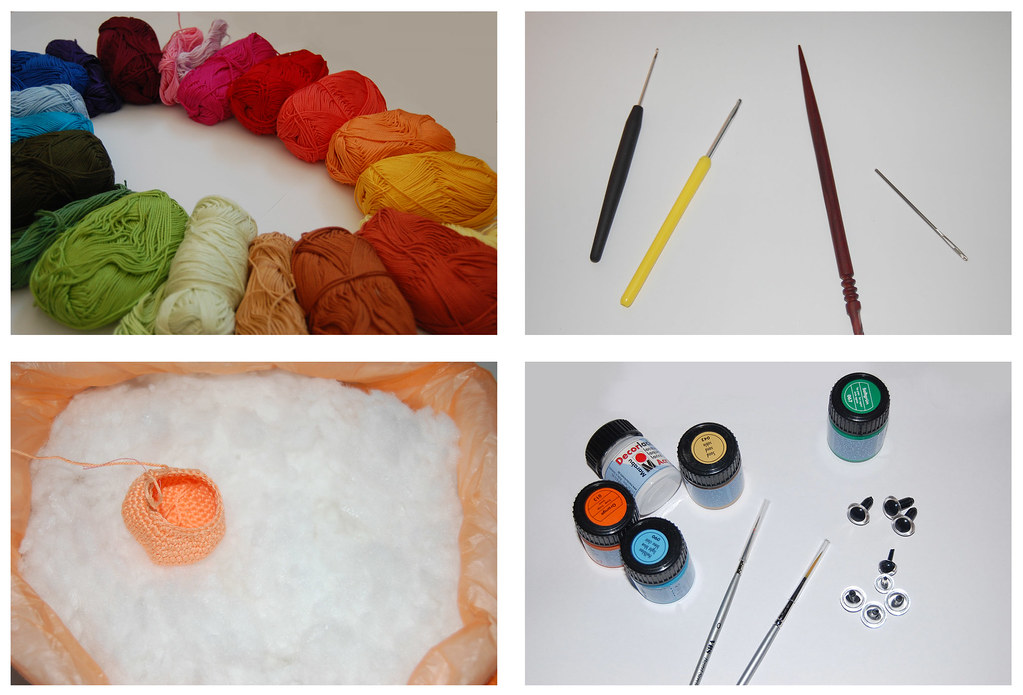
This post will cover what you should have at hand when you want to make an amigurumi.

The essentials obviously will have to be yarn, a matching crochet hook and something to stuff into your doll. You can use any kind of yarn you like, even thread or "yarn" made out of plastic bags or old t-shirts. (see here for a little tutorial on how to make plastic bag yarn, thanks to Helle from gooseflesh for writing it all up so properly)
When you have the yarn you like you will have to find a crochet hook that's creating the right gauge or tension, to speak in terms of amigurumi. Gauge doesn't matter that much because you can adjust the size of your doll with your gauge (bigger yarn and hook = bigger doll and vice versa) but gauge doesn't stop you from having holes in your doll. Which we obviously don't want, I don't want a doll that I could pull the stuffing out after I finished it. So Tension! How to find your tension? Try!, Sorry no better tip here, this depends on the way you hold the yarn, how you crochet and so on. First start to crochet something in the round (!) and then stretch the fabric you made a little to see if you will have big holes or not. If you like what you see then your hook will work great.
Another thing here is the color of your yarn, sometimes when working with very dark colors the stuffing will have the tendency to shine through (except if you have stuffing in another color than white, I haven't found any so far but would be thankful for a hint). To stop this shine-through-effect you might simply go down one or a half hook size and all wil be fine.
To stuff a doll I use polyfil. I actually use polyfil that's supposed for pillows. I found it has a better quality than polyfil for dolls and it is quite cheap as well, I recommend refill packs or maybe even pillows that are on sale if you want to try amigurumi before you start to buy all sorts of supplies.
You can use yarn as well or plastic / ceramic pellets. The big advatage of pellets is you can balance your dolls and make them stand on their own, with filling only the feet with pellets and the rest of the body with fluffy stuffing. To fill some body parts with pellets insert an old stocking (those thin tights) first and fill the pellets into the tights.
So now we checked off the essential basics. What more do we need? Plastic eyes come in very handy. Plastic safety eyes come in various sizes and colors. Check out etsy or ebay for some lovely handpainted eyes or try to paint them on your own (see my tutorial on handpainted eyes) If you want to paint your eyes by yourself you will have to buy clear eyes of course and varnish / lacquer. To insert eyes you just press the pole through the little spaces between two stitches and then press the washer onto the pole from the other side of the fabric (mostly the inside of your dolls head)
You can also use safety eyes as a connection between arms and body or legs and body. This way the arm / leg will be movable.
A good thing to have at hand when you want to add an eye is something pointy like wooden chopsticks. The wooden surface also gives good grip to stuff your doll but still is smooth enough to not pull everything out again when removing the chopstick. I use a lovely handcarved wooden hair stick for this purpose. I used to wear it but with my short hair I don't need it any longer.
Something else that's very handy sometimes is to have an extra hook, a smaller hook at hand. At very small circumferences it can be useful and will prevent you from stretching the stitch you have on your working hook. Additionally I often use slip stitches in my dolls and it can be very finger-breaking to try to force a normal working hook through those tight stitches. A smaller hook makes things that much easier.
Speaking of smaller hooks. Often you use thinner yarn, like pearl yarn to make some embellishments. A smaller hook, or better a gauge matching hook, is a must have here as well. Pearl yarn is good for smaller things like the background of eyes or tiny embellishments or to simply embroider your dolls face, with a mouth or nostrils or freckles.
When embroidering a doll I would recommend to use a pointy sewing needle, you can work through a stitch with a pointy needle and this will create a clearer picture. With a darning needle you only work through the little holes between two stitches, emroidering with a darning needle will create a ruffer look. Which can be useful as well, depending on what you want your doll to look like. A darning needle also is very useful to sew in yarn ends.
To add embellishments you can use more or less anything you can find. Sequins, little pearls, big pearls, shaped pearls, patch applications, really anything!
Now all that's left to have when making a lovely doll is to have fun!
Enjoy your work, Hugs, Diana
HOW TO - yarn the basics
I often get email or comments like this:
______________________
"I wondered if you could tell me if you need a certain thickness needle and yarn. Nowhere seems to specify the yarn type or needle type. Are they special for amigurumi?"
"what yarn do you use?"
______________________
"I wondered if you could tell me if you need a certain thickness needle and yarn. Nowhere seems to specify the yarn type or needle type. Are they special for amigurumi?"
"what yarn do you use?"
______________________
I found it hard at the beginning as well to determine the right yarn and hook (my very first amigurumi, a lion is 18 inches high, with the same pattern and an E hook I got a lion of "only" 6 inches tall)
so today will be all about yarn - there isn't THAT much to talk about actually, the basic secret is to get gauge, which means that you try the hook size with the yarn you want to use and see if you like the result.
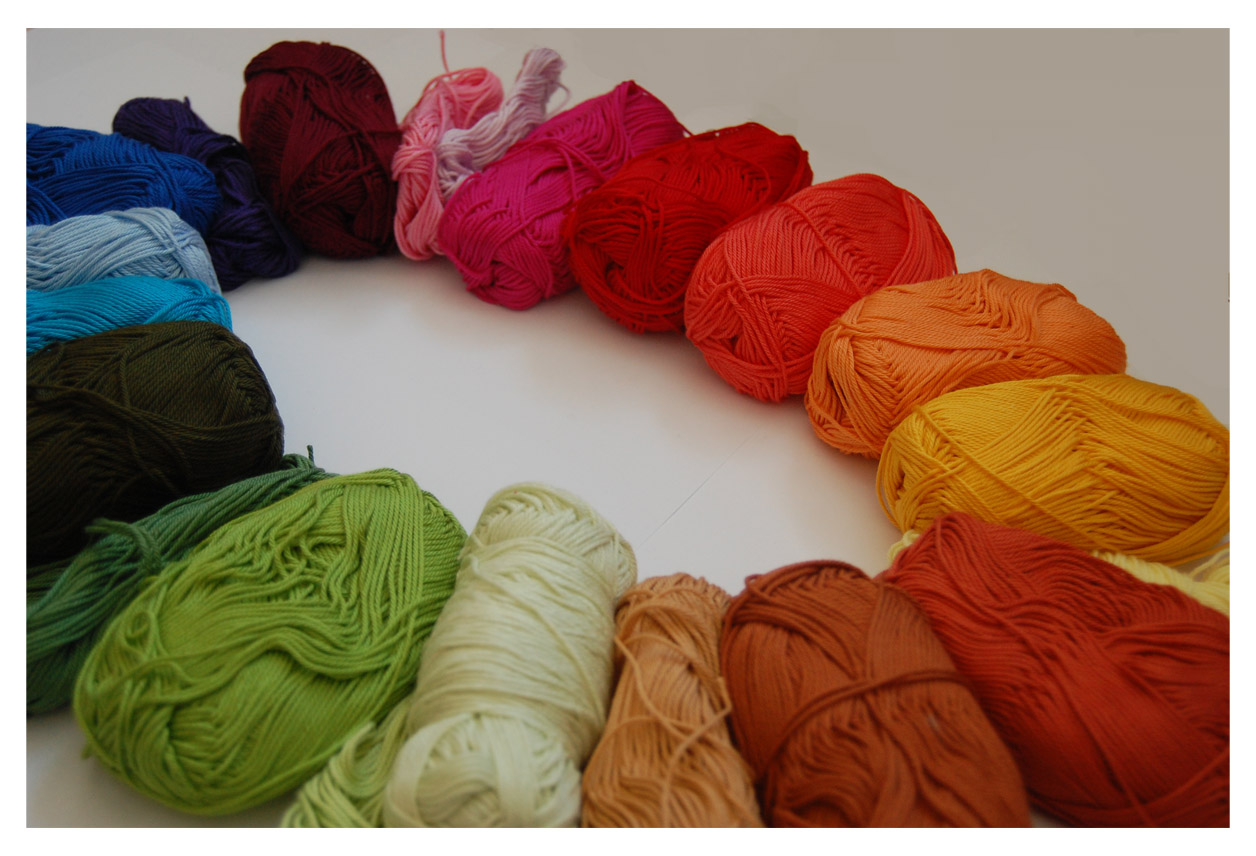
Most people use an E hook (3.5mm) and yarn that's supposed for this hook size. I use a cotton yarn called catania from schachenmayr, it is 100 % cotton and a very typical yarn to make potholders from. But you could use about any yarn you like, only keep in mind to have a hook that's matching gauge given on the yarn, if not a little smaller. Most items I see that are a little out of shape used hooks that were too big for the yarn they used. Also don't use a hook that's much too small, you will only break your fingers.
Some people even use thread and very tiny hooks and they get tiny amigurumi of course.
If you stick to the yarn and E hook your dolls will be about 5-7 inches high, depending on the pattern of course. So you can change the size of your doll with the yarn you use (this a neat way to have parental and child amigurumi families =^__^=)
Now grab some yarn and start crocheting, use cotton yarn, woolen yarn, some lovely handpainted yarn, something fluffy, make yourself yarn from plastic bags . . . and have a matching hook at hand
for more information on the essential basics have a look here
so today will be all about yarn - there isn't THAT much to talk about actually, the basic secret is to get gauge, which means that you try the hook size with the yarn you want to use and see if you like the result.
Most people use an E hook (3.5mm) and yarn that's supposed for this hook size. I use a cotton yarn called catania from schachenmayr, it is 100 % cotton and a very typical yarn to make potholders from. But you could use about any yarn you like, only keep in mind to have a hook that's matching gauge given on the yarn, if not a little smaller. Most items I see that are a little out of shape used hooks that were too big for the yarn they used. Also don't use a hook that's much too small, you will only break your fingers.
Some people even use thread and very tiny hooks and they get tiny amigurumi of course.
If you stick to the yarn and E hook your dolls will be about 5-7 inches high, depending on the pattern of course. So you can change the size of your doll with the yarn you use (this a neat way to have parental and child amigurumi families =^__^=)
Now grab some yarn and start crocheting, use cotton yarn, woolen yarn, some lovely handpainted yarn, something fluffy, make yourself yarn from plastic bags . . . and have a matching hook at hand
for more information on the essential basics have a look here
4/02/2009
fearing the dark
I must admit something: I get realy frightend when it's dark. I DO see monsters under my bed that try to catch me!
I can handle when it's dark and I can see properly, but the few moments when I switched the lights off and it's only dark, like in really (!) dark and I can see NOTHING, not a single thing, I get really freaky frightend!
Why am I telling you this? Because I positioned my bed onto four tables (so I have some storage space in my small flat and I also used to sleep "lifted" when I was a child so that was something I missed) and under these four tables there is DARK! I sometimes jump into my bed just to not let those monsters catch me and now I got to actually see what's living under there:

Melissa Sue created this monster that I just found wandering through my blog list. She creates all sorts of cool things, but this one just scared me and it's still bright and sunny outside and I thought I need to share with you. Anybody else scared?
p.s. I'm preparing two more tutorials for this weekend =^__^=
Abonnieren
Posts (Atom)