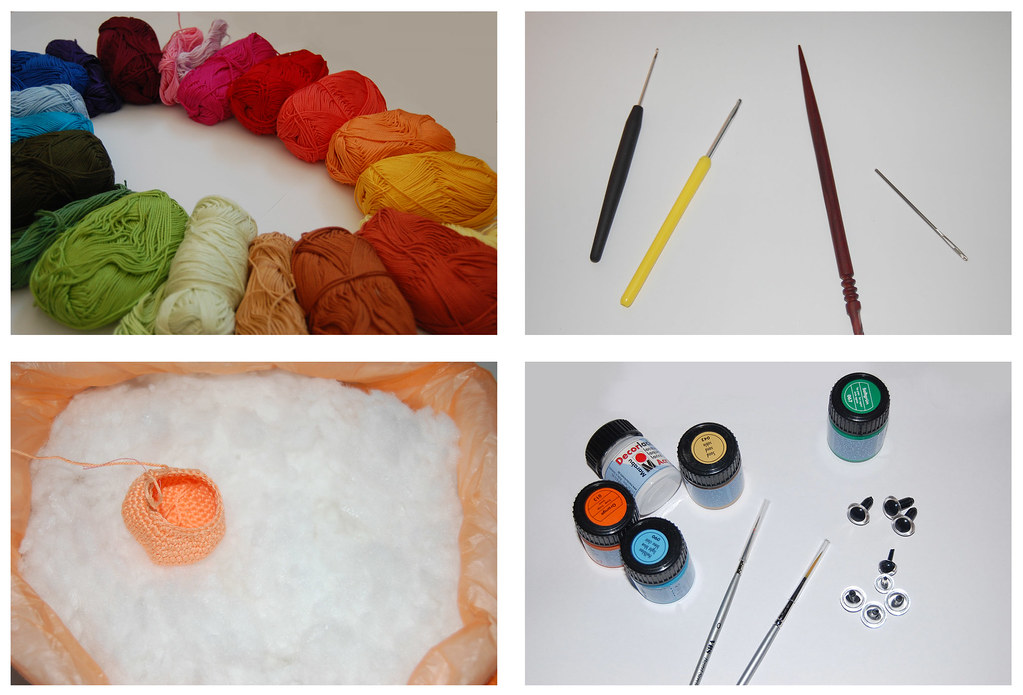
This post will cover what you should have at hand when you want to make an amigurumi.

The essentials obviously will have to be yarn, a matching crochet hook and something to stuff into your doll. You can use any kind of yarn you like, even thread or "yarn" made out of plastic bags or old t-shirts. (see here for a little tutorial on how to make plastic bag yarn, thanks to Helle from gooseflesh for writing it all up so properly)
When you have the yarn you like you will have to find a crochet hook that's creating the right gauge or tension, to speak in terms of amigurumi. Gauge doesn't matter that much because you can adjust the size of your doll with your gauge (bigger yarn and hook = bigger doll and vice versa) but gauge doesn't stop you from having holes in your doll. Which we obviously don't want, I don't want a doll that I could pull the stuffing out after I finished it. So Tension! How to find your tension? Try!, Sorry no better tip here, this depends on the way you hold the yarn, how you crochet and so on. First start to crochet something in the round (!) and then stretch the fabric you made a little to see if you will have big holes or not. If you like what you see then your hook will work great.
Another thing here is the color of your yarn, sometimes when working with very dark colors the stuffing will have the tendency to shine through (except if you have stuffing in another color than white, I haven't found any so far but would be thankful for a hint). To stop this shine-through-effect you might simply go down one or a half hook size and all wil be fine.
To stuff a doll I use polyfil. I actually use polyfil that's supposed for pillows. I found it has a better quality than polyfil for dolls and it is quite cheap as well, I recommend refill packs or maybe even pillows that are on sale if you want to try amigurumi before you start to buy all sorts of supplies.
You can use yarn as well or plastic / ceramic pellets. The big advatage of pellets is you can balance your dolls and make them stand on their own, with filling only the feet with pellets and the rest of the body with fluffy stuffing. To fill some body parts with pellets insert an old stocking (those thin tights) first and fill the pellets into the tights.
So now we checked off the essential basics. What more do we need? Plastic eyes come in very handy. Plastic safety eyes come in various sizes and colors. Check out etsy or ebay for some lovely handpainted eyes or try to paint them on your own (see my tutorial on handpainted eyes) If you want to paint your eyes by yourself you will have to buy clear eyes of course and varnish / lacquer. To insert eyes you just press the pole through the little spaces between two stitches and then press the washer onto the pole from the other side of the fabric (mostly the inside of your dolls head)
You can also use safety eyes as a connection between arms and body or legs and body. This way the arm / leg will be movable.
A good thing to have at hand when you want to add an eye is something pointy like wooden chopsticks. The wooden surface also gives good grip to stuff your doll but still is smooth enough to not pull everything out again when removing the chopstick. I use a lovely handcarved wooden hair stick for this purpose. I used to wear it but with my short hair I don't need it any longer.
Something else that's very handy sometimes is to have an extra hook, a smaller hook at hand. At very small circumferences it can be useful and will prevent you from stretching the stitch you have on your working hook. Additionally I often use slip stitches in my dolls and it can be very finger-breaking to try to force a normal working hook through those tight stitches. A smaller hook makes things that much easier.
Speaking of smaller hooks. Often you use thinner yarn, like pearl yarn to make some embellishments. A smaller hook, or better a gauge matching hook, is a must have here as well. Pearl yarn is good for smaller things like the background of eyes or tiny embellishments or to simply embroider your dolls face, with a mouth or nostrils or freckles.
When embroidering a doll I would recommend to use a pointy sewing needle, you can work through a stitch with a pointy needle and this will create a clearer picture. With a darning needle you only work through the little holes between two stitches, emroidering with a darning needle will create a ruffer look. Which can be useful as well, depending on what you want your doll to look like. A darning needle also is very useful to sew in yarn ends.
To add embellishments you can use more or less anything you can find. Sequins, little pearls, big pearls, shaped pearls, patch applications, really anything!
Now all that's left to have when making a lovely doll is to have fun!
Enjoy your work, Hugs, Diana
Keine Kommentare:
Kommentar veröffentlichen
Hinweis: Nur ein Mitglied dieses Blogs kann Kommentare posten.